Table of Contents
- How to Fix the Google Play Services Keeps Stopping Error on Android
- Solution No. 1: Getting Your Android Device Rebooted
- Solution No. 2: Updating the Google Play services App
- Solution No. 3: Get the Cache of Google Play Services app Cleared
- Solution No. 4: Disabling the Google Play services on a whole
- Solution No. 5: Getting the Google Play services updates Uninstalled and Reinstalled
- Solution No. 6: Getting Rid of the Entire Device’s Cache
- Frequently Asked Questions
Are you worried about this sudden message Unfortunately, Google Play services has stopped popping up? If it is the case, luckily, you’re just at the right place. This article holds down to every bit of information that you need to know today in order to fix the Google Play services keeps stopping Error. Make sure you walk through each of the solutions in the most comprehensive manner and get the Google Play services back on track in the snap of your finger.
Now, to be honest, you don’t need to be someone who holds a tweaking genius in himself or herself to solve this issue. Thankfully most of the basic errors that revolve around Android can be easily resolved, and nothing is different here as well. In this article, we shall talk about.
How to Fix the Google Play Services Keeps Stopping Error on Android
Solution No. 1: Getting Your Android Device Rebooted

If you’ve been seeking solutions to multiple smartphone errors recently, chances are high you’re quite familiar with this fix. It is, in general, one of the basic ways to quickly get rid of errors really quick, and to fix the Google Play services keeps stopping errors, the scenes are no different. No matter which factor landed you in a situation where the Play Services ceased working, genuinely, a simple restart is what you might need.
- At first, you’ll need to long press and hold the Power button on your very Android device. The long pressing should be continued until the entire boot pop-up window gets displayed on your screen.
- No, it depends on which device you’re using; select either the restart or the Reboot button.
- After that, you’ll need to wait until the process concludes.
- Once your Android device gets rebooted, you’ll have to check if your Google app or services is back on working track.
Are you already done with the process to encounter similar issues? Well, you don’t need to worry. We’ve got five other solutions to fix the Google Play services keeps stopping error.
Solution No. 2: Updating the Google Play services App

If you’re not having the automatic updates of Apps in the Play Store turned on, the chances are evident that your Google Play Services is outdated. In such a scenario, the services see abnormal activities every now and then. So, the next solution to fix the Google Play services issue that we’ve lined up today is a quick Google Play Services update.
- The very first step is to get yourself on the home screen of your Android device.
- After that, navigate to the
Google Play Store appon your smartphone. - Once done, you’ll need to press down the available three-line menu button that is situated on the top-left corner of your very app screen.
- From there on, select the option that says My Apps. You’ll find that option from the slide-out menu that pops up when you click the three dots.
- On this very screen, you’ll have all the apps listed. The apps stretch from the installed ones on your device, which are both updated and also the ones that seek to update.
- The next thing is to get your App updated. Better you Press the
Update Allbutton situated on the top end of the very display, or else you can manually look for theGoogle Play ServicesApp. Once done, wait until the process is completed. - Then you’ll need to reboot your smartphone.
- As soon as the device turns on, head over to the
Google Play Servicesand look if the issue is resolved.
Bonus Tip: Have the Auto Update Turned On
Google is well known for throwing updates on a regular basis, and the same goes for the Google Play services. The company actually brings the update to ensure the apps work flawlessly. The updates are a healthy way to get rid of issues like “not working” and more. So, to help you with that, we’re here with the ways to have the “auto-update” feature turned on.
- At first, you’ll need to launch the
Google Play Store appavailable on your device. - Now you’ll need to access the navigation sidebar. For that, again press the
three-line menu, which you’ll find on the top-right corner of your smartphone. - Next, scroll down the App and find the
Settingsbutton. The button is situated on the side menu. From there on, tap on the option that saysAuto-updateapps.
Once you make up to the setting menu, you’ll get introduced to three options. These are “Do not auto-update apps,” the “Auto-update apps at any given time,” and then the “Auto-update apps over Wi-Fi only.” Select one at your convenience.
Solution No. 3: Get the Cache of Google Play Services app Cleared
The cache is an integral part of any App, and the same is for Google Play Services. Although caches are quite essential for the working of any app, the same can be the reason for your App getting wonky. In such a situation, you can bring the apps their default position by simply clearing the App’s cache. Indeed, a great solution to fix the Google Play services keeps stopping error.
- Firstly, launch the Settings App on your smartphone simply using the app drawer. To make it simple, you can look for the gear icon on the main menu.
- While you’re on the main menu, scroll down and find the Apps section.
- You’ll now have the option called
Application Manager(Might be a bit different for different users) - Now from the whole list of apps, navigate to the
Google Play services. - After that, hit the Clear Cache button and move forward with it.
- Once the process concludes, move back to your home screen and reboot your device. In case you don’t know to reboot your device, you can always head over to the first fix.
Having the cache cleared, chances are high that the Google Play services will start operating back on normal terms. All the issues that were making room in the background will now get fixed. Also, any prevailing broken element will move out of the way, ensuring seamless functioning of the App. But again, if clearing cache helped you in no manner, the next solution is for you.
Solution No. 4: Disabling the Google Play services on a whole
To cut the chase short, you can’t remove the Google Play services directly unless you’re using a rooted device. We’re all aware of the fact that Google Play services are everything behind the functionality of any Google app, and this is the main reason why Android devices don’t allow the user to get off using any of the Google services under normal scenarios.
Thankfully there is still a way where you can disable the app check if the error message has ceased to exist. But again, this is just a quick solution that can help you get rid of the error message entirely. The complete procedure of disabling the Google Play services is getting your device rooted in the first instance.
- Launch the
SettingsApp on your smartphone and then simply scroll down. While you do that, look for the Security option and then the Device administrators. - On the Android Device Manager, you’ll notice that the functionality is enabled by default, so all you need to do is uncheck the enabled box and move forward, confirming the same.
Having the Android Device Manager disabled from the database of Device administrators, you’ll have the option to halt the services from the Google Play app. However, the process is not recommended. Disabling the Google Play services app, on the whole, can sometimes screw up the functionality of your device entirely. But still, you can try it for once if the other fixes turn out less helpful.
Solution No. 5: Getting the Google Play services updates Uninstalled and Reinstalled
Yes, you read that correctly. Sometimes a quick refresh can help you have a great time in getting rid of the issue and fix the Google Play services keeps stopping error from popping up. Although it might sound real generic, in reality, such action can eradicate the elements causing temporary technical issues pretty seamlessly.
- The first step involved in this process is having your device on and hovering over to the
SettingsApp. In order to do so, you can either use the app drawer together with the search bar or simply find and tap thegear iconon your Android device. - Next, move down the menu page and look for the option that says Apps. In the corresponding App menu (In certain devices, you might find something called the
Application Managerinstead of just theApps - Having the entire list of apps installed on your device right in front of your very eyes, navigate to the one under concern which is the
Google Play services. - Finally, you’ll need to find the Uninstall Updates button and click on it once the same appears. In case you need more help with finding the option, well, in most of the devices, the button lies within the three-dot menu icon on the very top-right corner.
Tapping on the button will make sure all the latest updates will get removed. This means that the Google Play services app will now get shifted to the default stock version. Once you’re done with the process, it is time you get the updates installed back again.
- The first step now is finding the App details. You can do that by navigating to the App info screen under Google Play services and scrolling all the way down.
- Clicking on that will end you on the very Play Store page where the Google Play services app is uploaded.
- All that needs to be done from your side is pressing the Update button.
- At last, wait as the system installs all the latest updates.
- As soon as the update is complete, navigate back to the home screen of your smartphone.
- Clear all the running apps using the regular task manager.
- Run a quick reboot making sure all the services are ready to start afresh.
Most likely, there will be no error message popping up. However, if you’re still being bothered by the “Google Services has Stopped” message, look for the sixth fix.
Solution No. 6: Getting Rid of the Entire Device’s Cache

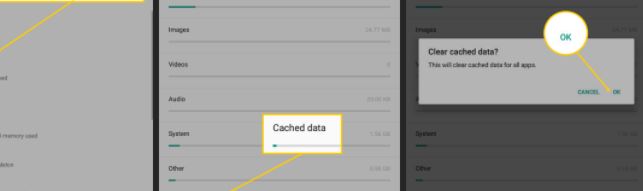
Having talked about the Google Play Services Cache a few moments back, sometimes you may even need to clear the cache of your device as a whole to make sure you fix the Google Play services keeps stopping error and the same never makes it way again. Now there are quite a few ways of dealing with the procedure; we’ve compiled a series of most flexible steps that can help you clear the device’s cache in the most flexible manner.
- Turn off your smartphone simply by pressing down the corresponding Power button of your device.
- With your device being off, hold down the following key combination at the same time.
“the Power button alongside the Volume Up button”
- Keep holding both until the screen boots up.
- Booting your device in this manner will end you up in recovery mode. Now, if it is something new for you, don’t worry; just follow along, and you’ll be good to go. The recovery mode is actually the best way of having the cache of your device wiped up entirely.
- Once you’re on recovery mode, you’ll notice that the touch commands are not works. Well, that’s normal. Instead, you’ll need to use the Volume buttons to navigate long.
- With the help of Volume buttons, find and select the option that says Wipe device cache.
- Wait for the process to complete.
- After that, restart your Android device.
Now the process might be alarming for many as it might seem misleading. But don’t worry, the process will not delete any of your App of data that your smartphone posts.
Frequently Asked Questions
Why does my phone keep saying Google Play Services has stopped?
The Google Play Services has stopped is a message which is pretty common among Android users. It represents an error that embeds in the functionality of the Google Play app.
Can I fix the Google Play Services Has Stopped Error?
Yes there are easy and straight forward methods by which you can fix the Google Play services Has Stopped Error. The fixes sometime takes just a simple reboot of your device, while at times you might need to get yourself in the recovery mode and have the device’s cache wiped off.
How to fix the Google Play services keeps stopping error on Android?
You can fix the Google Play services keeps stopping error message popping up using the following fixes:
- Updating the Google Play services App
- Getting Your Android Device Rebooted
- Get the Cache of Google Play Services app Cleared
- Disabling the Google Play services on a whole
- Getting the Google Play services updates Uninstalled and Reinstalled
- Getting Rid of the Entire Device’s Cache
Final Words
With that, we wrap up the best solutions to fix the Google Play services keeps stopping Error. Most of the time, a quick reboot or app update will help you get rid of the stopped working error message. While in some rare scenarios, users might need to clear caches and deal with all the similar kinds of stuff. We hope this article has been helpful. In case you face any trouble getting hold of any of the mentioned fixes, use the comment section to educate us about the same.