Table of Contents
Android Toast is used to display message for short span of time. Message appears on the screen for short span of time then disappears after some time.
We have already used toast in previous examples like Android SeekBar , Android RatingBar .
In this post, I am going to demonstrate how to make custom toast and use in your app.
Source code:
Lets create Android custom toast example:
Step 1 : Creating Project
Create an android application project named “CustomToastExampleApp”.
Step 2: Put any image in drawable folder with name “custom_toast_image”
Step 3 : Creating custom toast layout file
- Go to res -> layout
- Right click on layout
- Click on New -> File.
- Create a file named “custom_toast.xml” and paste below code in custom_toast.xml.
|
1 2 3 4 5 6 7 8 9 10 11 12 13 14 15 16 17 18 19 20 21 22 23 24 |
<?xml version="1.0" encoding="utf-8"?> <LinearLayout xmlns:android="http://schemas.android.com/apk/res/android" android:id="@+id/custom_toast_layout" android:layout_width="match_parent" android:layout_height="match_parent" android:background="#ffffe0" > <ImageView android:id="@+id/custom_toast_image" android:layout_width="wrap_content" android:layout_height="wrap_content" android:contentDescription="This is Custom toast image" android:src="@drawable/custom_toast_image"/> <TextView android:id="@+id/custom_toast_message" android:layout_width="wrap_content" android:layout_height="wrap_content" android:contentDescription="This is Custom toast" android:text="This is Custom toast" /> </LinearLayout> |
Step 4 : Creating Layout
Change res ->layout -> activity_main.xml as below:
|
1 2 3 4 5 6 7 8 9 10 11 12 13 14 15 16 17 18 19 20 21 22 23 24 25 26 |
<?xml version="1.0" encoding="utf-8"?> <RelativeLayout xmlns:android="http://schemas.android.com/apk/res/android" xmlns:tools="http://schemas.android.com/tools" android:id="@+id/activity_main" android:layout_width="match_parent" android:layout_height="match_parent" android:paddingBottom="@dimen/activity_vertical_margin" android:paddingLeft="@dimen/activity_horizontal_margin" android:paddingRight="@dimen/activity_horizontal_margin" android:paddingTop="@dimen/activity_vertical_margin" tools:context="com.java2blog.customtoastexampleapp.MainActivity"> <Button android:text="Click to show Custom toast" android:layout_width="wrap_content" android:layout_height="wrap_content" android:layout_alignParentTop="true" android:layout_alignParentLeft="true" android:layout_alignParentStart="true" android:layout_marginLeft="16dp" android:layout_marginStart="16dp" android:layout_marginTop="16dp" android:id="@+id/button" /> </RelativeLayout> |
Step 5 : Creating MainActivity
Change src/main/packageName/MainActivity.java as below:
|
1 2 3 4 5 6 7 8 9 10 11 12 13 14 15 16 17 18 19 20 21 22 23 24 25 26 27 28 29 30 31 32 33 34 35 36 37 38 39 40 41 42 |
package com.java2blog.splashscreenexampleapp; import android.app.Activity; import android.os.Bundle; package com.java2blog.customtoastexampleapp; import android.support.v7.app.AppCompatActivity; import android.os.Bundle; import android.view.LayoutInflater; import android.view.View; import android.view.ViewGroup; import android.widget.Button; import android.widget.Toast; public class MainActivity extends AppCompatActivity { Button button; @Override protected void onCreate(Bundle savedInstanceState) { super.onCreate(savedInstanceState); setContentView(R.layout.activity_main); button=(Button)findViewById(R.id.button); button.setOnClickListener(new View.OnClickListener() { @Override public void onClick(View v) { //Creating the LayoutInflater instance LayoutInflater liCustomToast = getLayoutInflater(); //Getting the View object as defined in the custom_toast.xml file View layout = liCustomToast.inflate(R.layout.custom_toast, (ViewGroup) findViewById(R.id.custom_toast_layout)); //Creating the Toast object Toast toast = new Toast(getApplicationContext()); toast.setDuration(Toast.LENGTH_LONG); toast.setView(layout);//setting the view of custom toast layout toast.show(); } }); } } |
It is default MainActivity provided by HelloWorld app.
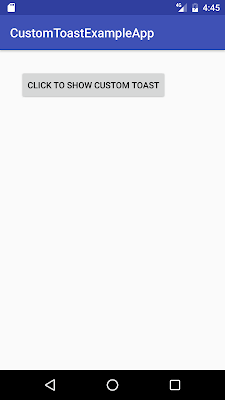
Step 6 : Running the app
When you run the app, you will get below screen:
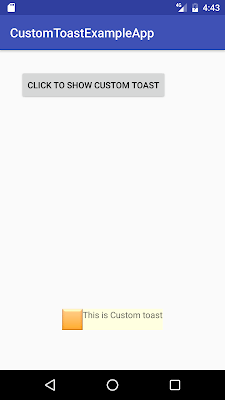
When you click on the button, you will get below screen.
Was this post helpful?
Let us know if this post was helpful. Feedbacks are monitored on daily basis. Please do provide feedback as that\'s the only way to improve.