Table of Contents
In this post, we are going to see Android webview example.
Android WebView is a android UI widget which is used to open any web url or load html data. It is used to show web page in android activity. In simple words, Andorid WebView is a View that displays web pages.
Example :
Lets say You are creating an android app and you have some user agreement or some web pages hosted online, you can just render it using Android WebView.
There are two methods which we generally use to open web url or load html data.
- loadUrl
- loadData
I am going to demonstrate about loadUrl in this post and loadData in next post.
Source code:
Step 1 :Creating Project
Create an android application project named “WebViewExampleApp”.
Step 2 : Creating Layout
Change res ->layout -> activity_main.xml as below:
|
1 2 3 4 5 6 7 8 9 10 11 12 13 14 15 16 17 18 19 20 |
<?xml version="1.0" encoding="utf-8"?> <RelativeLayout xmlns:android="http://schemas.android.com/apk/res/android" xmlns:tools="http://schemas.android.com/tools" android:id="@+id/activity_main" android:layout_width="match_parent" android:layout_height="match_parent" android:paddingBottom="@dimen/activity_vertical_margin" android:paddingLeft="@dimen/activity_horizontal_margin" android:paddingRight="@dimen/activity_horizontal_margin" android:paddingTop="@dimen/activity_vertical_margin" tools:context="com.java2blog.webviewexampleapp.MainActivity"> <WebView android:id="@+id/webView" android:layout_width="fill_parent" android:layout_height="fill_parent" /> </RelativeLayout> |
Step 3 : Creating MainActivity
Change src/main/packageName/MainActivity.java as below:
|
1 2 3 4 5 6 7 8 9 10 11 12 13 14 15 16 17 18 19 20 21 22 23 24 25 26 27 28 29 30 31 32 33 34 35 36 37 38 39 40 41 42 43 44 45 46 47 48 49 50 51 52 |
package com.java2blog.webviewexampleapp; import android.graphics.Bitmap; import android.support.v7.app.AppCompatActivity; import android.os.Bundle; import android.webkit.WebView; import android.webkit.WebViewClient; public class MainActivity extends AppCompatActivity { private WebView webView; @Override protected void onCreate(Bundle savedInstanceState) { super.onCreate(savedInstanceState); setContentView(R.layout.activity_main); webView = (WebView) findViewById(R.id.webView); webView.setWebViewClient(new myWebClient()); webView.getSettings().setJavaScriptEnabled(true); webView.loadUrl("https://www.java2blog.com"); } public class myWebClient extends WebViewClient { @Override public void onPageStarted(WebView view, String url, Bitmap favicon) { super.onPageStarted(view, url, favicon); } @Override public boolean shouldOverrideUrlLoading(WebView view, String url) { view.loadUrl(url); return true; } } @Override // This method is used to detect back button public void onBackPressed() { if(webView.canGoBack()) { webView.goBack(); } else { // Let the system handle the back button super.onBackPressed(); } } } |
We are getting WebView reference from layout file and then using WebView’s loadUrl method to load the URL
Step 4: Add internet permission in AndroidManifest.xml
Copy following code:
Done, we have added internet permission to AndroidManifest.xml. Your application must be able to access internet now.
|
1 2 3 |
<uses-permission android:name="android.permission.INTERNET" /> |
Put it in AndroidManifest.xml
|
1 2 3 4 5 6 7 8 9 10 11 12 13 14 15 16 17 18 19 20 21 22 23 |
<?xml version="1.0" encoding="utf-8"?> <manifest xmlns:android="http://schemas.android.com/apk/res/android" package="com.java2blog.webviewexampleapp"> <uses-permission android:name="android.permission.INTERNET" /> <application android:allowBackup="true" android:icon="@mipmap/ic_launcher" android:label="@string/app_name" android:supportsRtl="true" android:theme="@style/AppTheme"> <activity android:name=".MainActivity"> <intent-filter> <action android:name="android.intent.action.MAIN" /> <category android:name="android.intent.category.LAUNCHER" /> </intent-filter> </activity> </application> </manifest> |
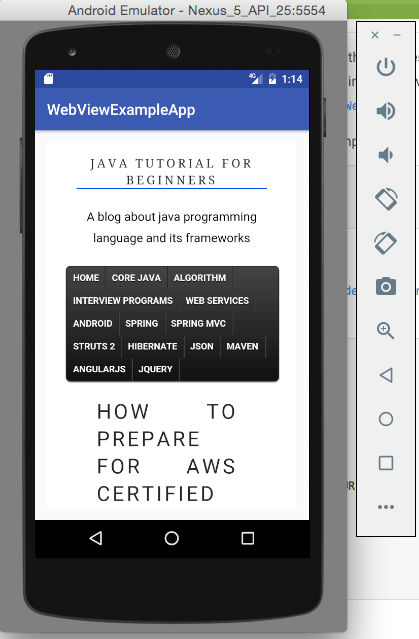
Step 5 : Running the app
When you run the app, you will get below screen:
Was this post helpful?
Let us know if this post was helpful. Feedbacks are monitored on daily basis. Please do provide feedback as that\'s the only way to improve.