Table of Contents
In previous post,we have used default login page generated by Spring security framework. In this post, we will see how to use custom login page in Spring security.
Spring MVC tutorial:
- Spring MVC hello world example
- Spring MVC Hibernate MySQL example
- Spring MVC interceptor example
- Spring MVC angularjs example
- Spring MVC @RequestMapping example
- Spring Component,Service, Repository and Controller example
- Spring MVC @ModelAttribute annotation example
- Spring MVC @RestController annotation example
- Spring MultiActionController Example
- Spring MVC ModelMap
- Spring MVC file upload example
- Spring restful web service example
- Spring restful web service json example
- Spring Restful web services CRUD example
- Spring security hello world example
- Spring security cus
In this post, we will see how to apply custom login form spring security to spring mvc hello world example.
If you want to secure your spring web application , you just need to configure some files to make it happen using spring security. We will apply login security on hello world example, so when only authorised users will be able to access hello world message.
Here are steps to apply spring security custom login form on spring mvc hello world example.
Step 1:
Create Spring mvc hello world example named SpringSecurityHelloWorldExample . It will create basic spring mvc application.
Step 2:
Add spring security to pom.xml. You need to add following dependencies to the pom.
|
1 2 3 4 5 6 7 8 9 10 11 12 13 14 15 16 17 18 19 20 21 22 23 24 25 26 27 28 29 30 31 32 33 34 35 36 37 38 39 40 41 42 43 44 45 46 47 48 49 50 51 52 53 54 55 56 57 58 59 60 61 62 63 64 65 66 67 68 69 70 71 72 73 74 75 76 77 78 79 80 81 82 83 84 |
<project xmlns="http://maven.apache.org/POM/4.0.0" xmlns:xsi="http://www.w3.org/2001/XMLSchema-instance" xsi:schemaLocation="http://maven.apache.org/POM/4.0.0 http://maven.apache.org/maven-v4_0_0.xsd"> <modelVersion>4.0.0</modelVersion> <groupId>com.arpit.java2blog</groupId> <artifactId>SpringSecurityHelloWorlExample</artifactId> <packaging>war</packaging> <version>0.0.1-SNAPSHOT</version> <name>SpringSecurityHelloWorldExample Maven Webapp</name> <url>http://maven.apache.org</url> <dependencies> <dependency> <groupId>junit</groupId> <artifactId>junit</artifactId> <version>3.8.1</version> <scope>test</scope> </dependency> <dependency> <groupId>javax.servlet</groupId> <artifactId>javax.servlet-api</artifactId> <version>3.1.0</version> </dependency> <dependency> <groupId>org.springframework</groupId> <artifactId>spring-core</artifactId> <version>${spring.version}</version> </dependency> <dependency> <groupId>org.springframework</groupId> <artifactId>spring-webmvc</artifactId> <version>${spring.version}</version> </dependency> <!-- Spring Security --> <dependency> <groupId>org.springframework.security</groupId> <artifactId>spring-security-core</artifactId> <version>${security.version}</version> </dependency> <dependency> <groupId>org.springframework.security</groupId> <artifactId>spring-security-web</artifactId> <version>${security.version}</version> </dependency> <dependency> <groupId>org.springframework.security</groupId> <artifactId>spring-security-config</artifactId> <version>${security.version}</version> </dependency> <dependency> <groupId>jstl</groupId> <artifactId>jstl</artifactId> <version>1.2</version> <scope>provided</scope> </dependency> </dependencies> <build> <finalName>SpringSecurityHelloWorlExample</finalName> <plugins> <plugin> <groupId>org.apache.maven.plugins</groupId> <artifactId>maven-compiler-plugin</artifactId> <version>3.1</version> <configuration> <source>${jdk.version}</source> <target>${jdk.version}</target> </configuration> </plugin> </plugins> </build> <properties> <spring.version>4.2.1.RELEASE</spring.version> <security.version>4.0.3.RELEASE</security.version> <jdk.version>1.7</jdk.version> </properties> </project> |
Create Controller and view
step 3:
Change controller class named “HelloWorldController.java” as below
|
1 2 3 4 5 6 7 8 9 10 11 12 13 14 15 16 17 18 19 20 21 22 23 24 25 26 27 28 29 30 31 32 33 34 35 36 37 |
package org.arpit.java2blog.springmvc.controller; import java.security.Principal; import org.springframework.stereotype.Controller; import org.springframework.ui.ModelMap; import org.springframework.web.bind.annotation.RequestMapping; import org.springframework.web.bind.annotation.RequestMethod; import org.springframework.web.servlet.ModelAndView; @Controller public class HelloWorldController { @RequestMapping("/helloworld") public ModelAndView hello(ModelMap model,Principal principal) { String loggedInUserName=principal.getName(); return new ModelAndView("hello", "userName", loggedInUserName); } @RequestMapping(value="/login", method = RequestMethod.GET) public String login(ModelMap model) { return "login"; } @RequestMapping(value="/loginError", method = RequestMethod.GET) public String loginError(ModelMap model) { model.addAttribute("error", "true"); return "login"; } } |
Here We have used Principal object to get current logged in username. It is set by Spring security framework.
Step 4:
Modify hello.jsp in /WEB-INF/pages folder
|
1 2 3 4 5 6 7 8 9 10 11 12 13 14 15 16 17 18 19 |
<%@ page language="java" contentType="text/html; charset=UTF-8" pageEncoding="UTF-8"%> <%@ taglib prefix="c" uri="http://java.sun.com/jsp/jstl/core"%> <!DOCTYPE html PUBLIC "-//W3C//DTD HTML 4.01 Transitional//EN" "http://www.w3.org/TR/html4/loose.dtd"> <html> <head> <meta http-equiv="Content-Type" content="text/html; charset=UTF-8"> <title>Hello</title> </head> <body> ${message} <c:url value="/j_spring_security_logout" var="logoutUrl" /> Log Out </body> </html> |
Create login.jsp in /WEB-INF/pages folder
|
1 2 3 4 5 6 7 8 9 10 11 12 13 14 15 16 17 18 19 20 21 22 23 24 25 26 27 28 29 30 31 32 33 34 35 36 37 38 39 40 41 42 43 44 45 46 47 |
<%@ taglib prefix="c" uri="http://java.sun.com/jsp/jstl/core"%> <html> <style type="text/css"> <%@include file="style.css" %> </style> <head> <title>Custom Login Page</title> </head> <body onload='document.loginForm.j_username.focus();'> <h3>Custom Login Page</h3> <% String errorString = (String)request.getAttribute("error"); if(errorString != null && errorString.trim().equals("true")){ out.println("<span class="dark">Incorrect login name or password. Please try again"); } %> <form name='loginForm' action="<c:url value='login' />"" method='POST'> <table> <tr> <td>User:</td> <td><input type='text' name='username' value=''> </td> </tr> <tr> <td>Password:</td> <td><input type='password' name='password' /> </td> </tr> <tr> <td><input name="submit" type="submit" value="submit" /> </td> <td><input name="reset" type="reset" /> </td> </tr> </table> </form> </body> </html> |
We have used css file in above login.jsp. Create style.css file as below.
|
1 2 3 4 5 6 7 8 9 10 |
#header { font-size:40px; } .dark { color:red; } |
Step 6:
Now we need to add spring configuration xml. Create a file named spring-security.xml.
|
1 2 3 4 5 6 7 8 9 10 11 12 13 14 15 16 17 18 19 20 21 22 23 24 25 26 27 28 29 30 |
<beans:beans xmlns="http://www.springframework.org/schema/security" xmlns:beans="http://www.springframework.org/schema/beans" xmlns:xsi="http://www.w3.org/2001/XMLSchema-instance" xsi:schemaLocation="http://www.springframework.org/schema/beans http://www.springframework.org/schema/beans/spring-beans-4.0.xsd http://www.springframework.org/schema/security http://www.springframework.org/schema/security/spring-security-4.0.xsd"> <http auto-config="true" use-expressions="true"> <intercept-url pattern="/resources/**" access="permitAll" /> <intercept-url pattern="/hello*" access="hasRole('ROLE_ADMIN')" /> <form-login login-page="/login" default-target-url="/helloworld" authentication-failure-url="/loginError" /> <logout logout-success-url="/" logout-url="/j_spring_security_logout" /> <csrf disabled="true" /> </http> <authentication-manager> <authentication-provider> <user-service> <user name="java2blog" password="java123" authorities="ROLE_ADMIN" /> <user name="arpit" password="arpit123" authorities="ROLE_ADMIN" /> </user-service> </authentication-provider> </authentication-manager> </beans:beans> |
We have used form-login in above file, so if user tries to access any secured url, he will be authenticated based on above form-login configuration.
Lets understand meaning of each attribute of form-login tag
login-page : we need to provide url for login page.
default-target-url : here if authentication is successful, then target page url should be provided.
authentication-failure-url : if authentication is unsuccessful, then redirection page url should be provided here.
intercept-url configure for which pattern what kind of security is configured. For example: If http request url has pattern /hello*(hello.jsp,helloworld.html), it will be accessed to ROLE_ADMIN only.
We have hardcoded username(java2blog and arpit) and password(java123 and arpit123) in authentication manager, so if user provides correct credential for admin then only he will be able to access helloworld.html.
Step 7:
springmvc-dispatcher-servlet.xml
|
1 2 3 4 5 6 7 8 9 10 11 12 13 14 15 16 17 18 19 20 21 22 |
<beans xmlns="http://www.springframework.org/schema/beans" xmlns:context="http://www.springframework.org/schema/context" xmlns:mvc="http://www.springframework.org/schema/mvc" xmlns:xsi="http://www.w3.org/2001/XMLSchema-instance" xsi:schemaLocation=" http://www.springframework.org/schema/beans http://www.springframework.org/schema/beans/spring-beans-3.0.xsd http://www.springframework.org/schema/context http://www.springframework.org/schema/context/spring-context-3.0.xsd http://www.springframework.org/schema/mvc http://www.springframework.org/schema/mvc/spring-mvc-3.0.xsd"> <context:component-scan base-package="org.arpit.java2blog.springmvc.controller" /> <bean class="org.springframework.web.servlet.view.InternalResourceViewResolver"> <property name="prefix"> <value>/WEB-INF/pages/</value> </property> <property name="suffix"> <value>.jsp</value> </property> </bean> <mvc:annotation-driven/> </beans> |
Step 8: We need to change in web.xml to configure spring security.
|
1 2 3 4 5 6 7 8 9 10 11 12 13 14 15 16 17 18 19 20 21 22 23 24 25 26 27 28 29 30 31 32 33 34 35 36 37 38 39 40 41 42 43 |
<?xml version="1.0" encoding="UTF-8"?> <web-app xmlns:xsi="http://www.w3.org/2001/XMLSchema-instance" xmlns="http://java.sun.com/xml/ns/javaee" xsi:schemaLocation="http://java.sun.com/xml/ns/javaee http://java.sun.com/xml/ns/javaee/web-app_3_0.xsd" version="3.0"> <display-name>Archetype Created Web Application</display-name> <welcome-file-list> <welcome-file>index.jsp</welcome-file> </welcome-file-list> <servlet> <servlet-name>springmvc-dispatcher</servlet-name> <servlet-class> org.springframework.web.servlet.DispatcherServlet </servlet-class> <load-on-startup>1</load-on-startup> </servlet> <servlet-mapping> <servlet-name>springmvc-dispatcher</servlet-name> <url-pattern>/</url-pattern> </servlet-mapping> <context-param> <param-name>contextConfigLocation</param-name> <param-value> /WEB-INF/springmvc-dispatcher-servlet.xml, /WEB-INF/spring-security.xml </param-value> </context-param> <listener> <listener-class>org.springframework.web.context.ContextLoaderListener</listener-class> </listener> <!-- Spring Security --> <filter> <filter-name>springSecurityFilterChain</filter-name> <filter-class>org.springframework.web.filter.DelegatingFilterProxy</filter-class> </filter> <filter-mapping> <filter-name>springSecurityFilterChain</filter-name> <url-pattern>/*</url-pattern> </filter-mapping> </web-app> |
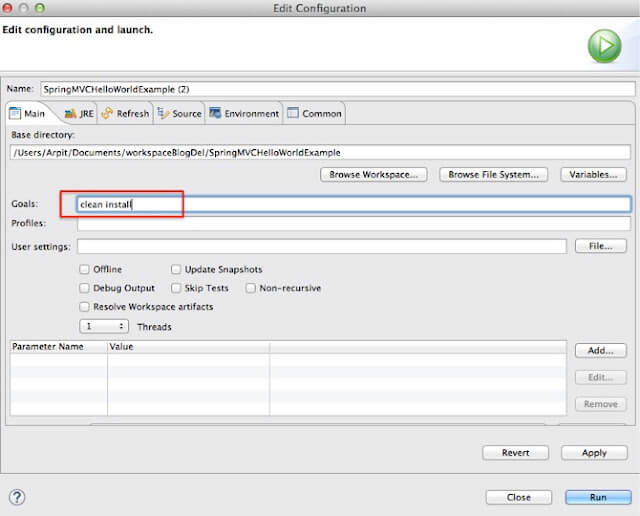
It’s time for maven build.
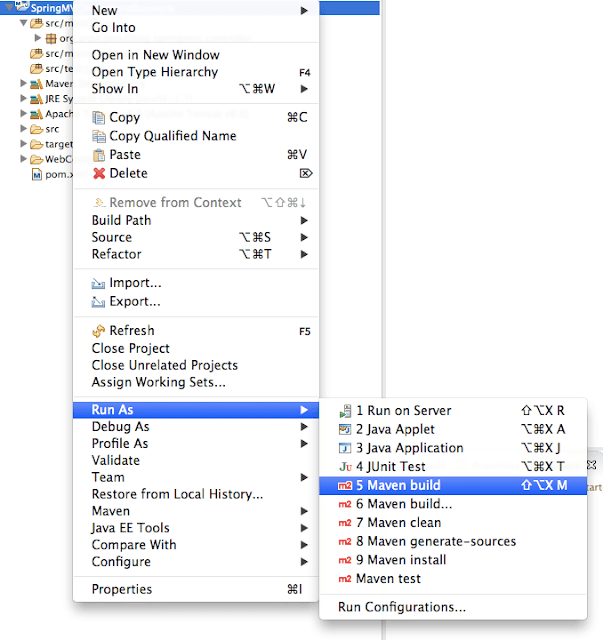
Run the application
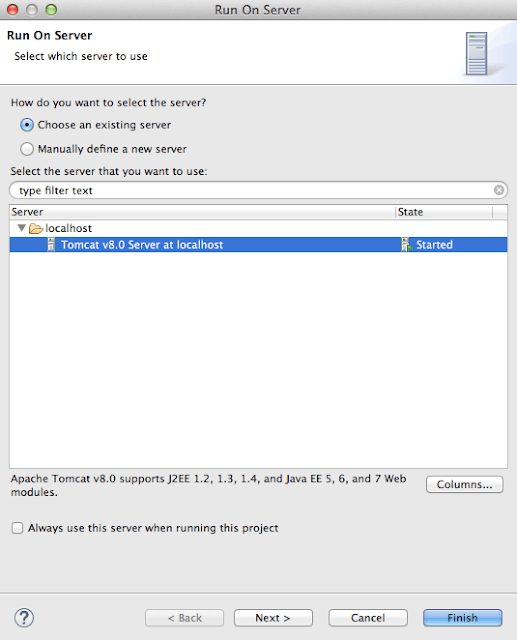
Right click on project -> run as -> run on server
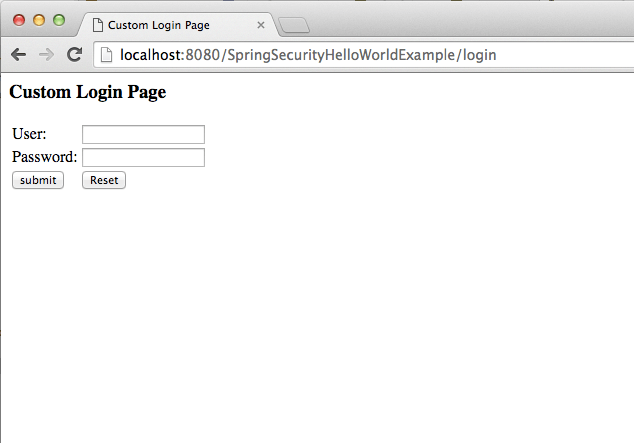
You will see below screen:
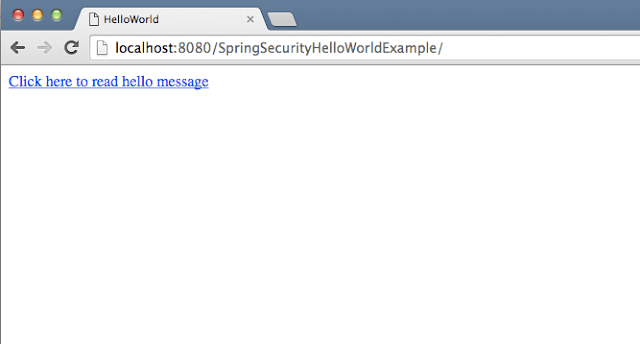
When you click on above link, you will get following login page.
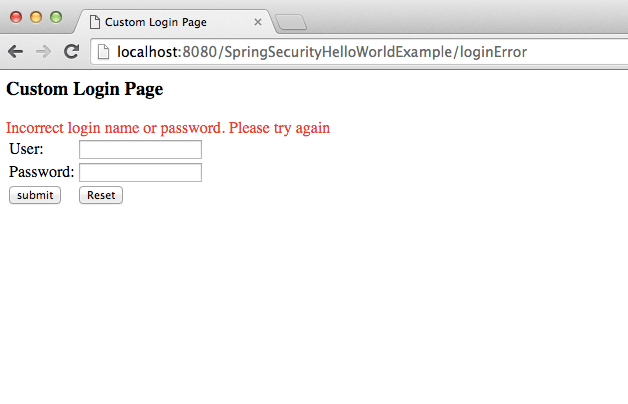
If you put wrong password and try to login, you will get below screen
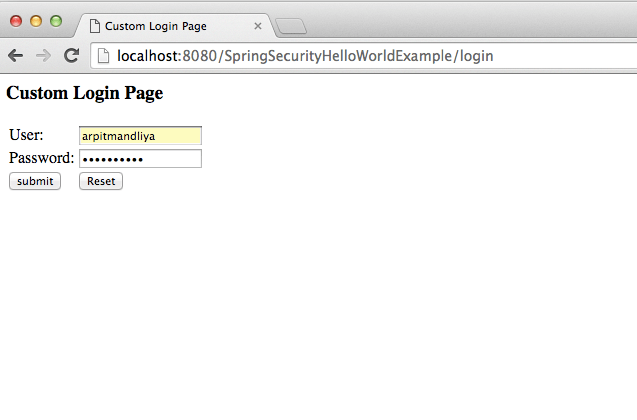
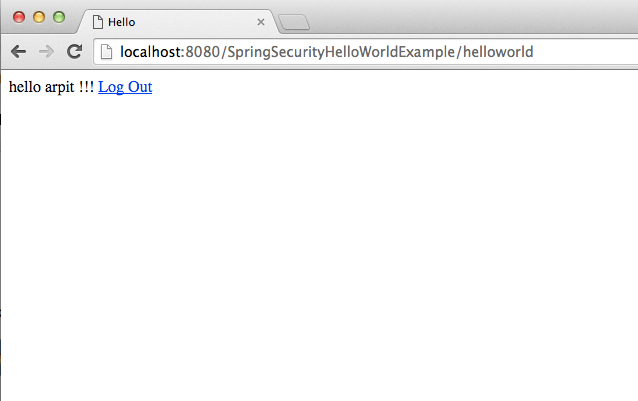
If you put correct user id and password
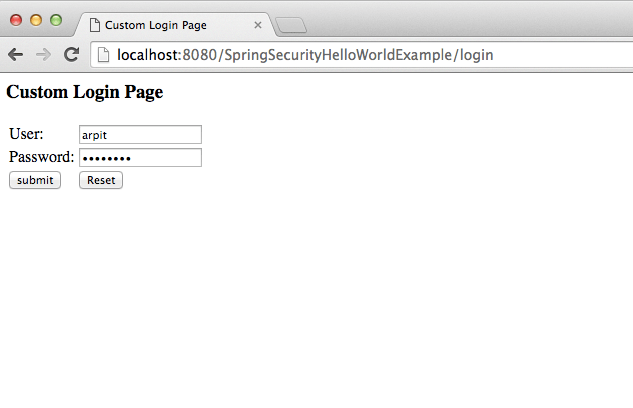
Bingo !! you have logged in successfully.
When you click on logout, you will be back to first screen.
Download source code:
Please comment if you have any issues with above post.
Appreciating the dedication you put into your blog and in depth information you offer. It’s nice to come across a blog every once in a while that isn’t the same old rehashed information. Great read! I’ve saved your site and I’m adding your RSS feeds to my Google account.