Table of Contents
In this tutorial, we will see how to create Spring boot + ActiveMQ example.
Spring boot comes with embedded ActiveMQ similar to tomcat, so you don’t have to create external ActiveMQ.If want to configure with external ActiveMQ, you can do it just by change in application.properties file.
Github Source code:
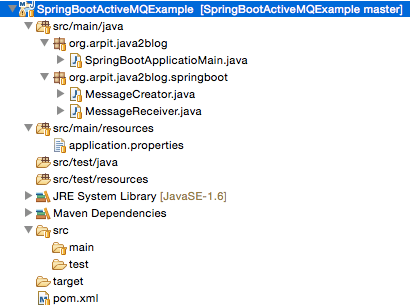
Project Structure:
Here are steps to create Spring Boot + ActiveMQ example.
Step 1: Create a simple java project using maven in eclipse named "SpringBootActiveMQExample".
Step 2: Change "pom.xml" as below:
|
1 2 3 4 5 6 7 8 9 10 11 12 13 14 15 16 17 18 19 20 21 22 23 24 |
<project xmlns="http://maven.apache.org/POM/4.0.0" xmlns:xsi="http://www.w3.org/2001/XMLSchema-instance" xsi:schemaLocation="http://maven.apache.org/POM/4.0.0 http://maven.apache.org/xsd/maven-4.0.0.xsd"> <modelVersion>4.0.0</modelVersion> <groupId>org.arpit.java2blog</groupId> <artifactId>SpringBootActiveMQExample</artifactId> <version>0.0.1-SNAPSHOT</version> <parent> <groupId>org.springframework.boot</groupId> <artifactId>spring-boot-starter-parent</artifactId> <version>1.5.3.RELEASE</version> <relativePath /> </parent> <dependencies> <dependency> <groupId>org.springframework.boot</groupId> <artifactId>spring-boot-starter-activemq</artifactId> </dependency> </dependencies> <build> <finalName>SpringBootActiveMQExample</finalName> </build> </project> |
The spring-boot-starter-parent provides you all maven defaults required for any spring project.
Since we are developing a spring application integrated with activemq, we also need to add spring-boot-starter-activemq dependency.
This will include additional dependencies such Spring boot, activemq etc which are required for this application.
Step 3: Create a file named "MessageCreator.java" in package .org.arpit.java2blog.springboot
|
1 2 3 4 5 6 7 8 9 10 11 12 13 14 15 16 17 18 19 20 21 22 23 24 25 |
package org.arpit.java2blog.springboot; import javax.jms.Queue; import org.springframework.beans.factory.annotation.Autowired; import org.springframework.boot.CommandLineRunner; import org.springframework.jms.core.JmsMessagingTemplate; import org.springframework.stereotype.Component; @Component public class MessageCreator implements CommandLineRunner { @Autowired private JmsMessagingTemplate jmsMessagingTemplate; @Autowired private Queue queue; public void run(String... arg0) throws Exception { // This will put text message to queue this.jmsMessagingTemplate.convertAndSend(this.queue, "Hello Java2blog!!"); System.out.println("Message has been put to queue by sender"); } } |
Step 4: Create a file named "MessageReceiver.java" in package .org.arpit.java2blog.springboot
|
1 2 3 4 5 6 7 8 9 10 11 12 13 14 15 16 17 18 19 |
package org.arpit.java2blog.springboot; import org.springframework.jms.annotation.JmsListener; import org.springframework.stereotype.Component; @Component public class MessageReceiver { @JmsListener(destination = "java2blog.queue") public void receiveQueue(String text) { try { Thread.sleep(5000); } catch (InterruptedException e) { e.printStackTrace(); } System.out.println("Message Received: "+text); } } |
@JMSListner:This Annotation is actually used to mark a method to be the target of a JMS message listener on the specified destination().
Step 5: Create a file named “application.properties” in package /src/main/resources
|
1 2 3 4 |
spring.activemq.in-memory=true spring.activemq.pool.enabled=false |
If you want to use external activemq, just use below application.properties
|
1 2 3 |
spring.activemq.broker-url=tcp://localhost:61616 |
Please note that you just need to provide ActiveMQ broker url, if you specify above property then Spring boot won’t create another in memory embedded ActiveMQ.
Step 6: Create a file named "SpringBootApplicatioMain.java" in package .org.arpit.java2blog
|
1 2 3 4 5 6 7 8 9 10 11 12 13 14 15 16 17 18 19 20 21 22 23 24 25 26 |
package org.arpit.java2blog; import javax.jms.Queue; import org.apache.activemq.command.ActiveMQQueue; import org.springframework.boot.SpringApplication; import org.springframework.boot.autoconfigure.SpringBootApplication; import org.springframework.context.annotation.Bean; import org.springframework.jms.annotation.EnableJms; @SpringBootApplication @EnableJms public class SpringBootApplicatioMain { public static void main(String[] args) { SpringApplication.run(SpringBootApplicatioMain.class, args); } @Bean public Queue queue() { return new ActiveMQQueue("java2blog.queue"); } } |
We have just added @SpringBootApplication and it does all the work.
Let’s understand more about this annotation.
@SpringBootApplication is an annotation that adds all of the following:
@Configuration makes the class as a source of bean definitions for the application context.
@EnableAutoConfiguration enables Spring boot to add beans presents in classpath setting and various property setting.
This flags the application as a web application and activates key behaviors such as setting up a DispatcherServlet.
@ComponentScan tells Spring to look for other components, configurations, and services in the default package, allowing it to find the controllers.
If specific packages are not defined, scanning will occur from the package of the class that declares this annotation.
@EnableJMS annotation is used to trigger search for method annotated with @JMSListener, hence to create JMS listener in the background.
When you run above program, you will get below output:
Message has been put to queue by sender
2017-04-30 19:14:44.438 INFO 8757 — [ main] o.a.java2blog.SpringBootApplicatioMain : Started SpringBootApplicatioMain in 2.852 seconds (JVM running for 3.548)
Message Received: Hello Java2blog!!
That ‘s all about Spring Boot + ActiveMQ example.Please comment you find any issue.
Nice article, Easy explanation.