Table of Contents
In this post, we will see how to create soap web services with Spring boot.
We will create contract first soap web service with Spring boot. We will focus on how to define configurations for soap web services.
Tools used
-
- JDK 1.8, Eclipse, Maven
- Spring-boot – Underlying application framework
- wsdl4j – for publishing WSDL for our Service
- JAXB maven plugin – for code generation
- SOAP-UI – for testing our soap web service
Project structure

Let’s create a simple spring boot application.
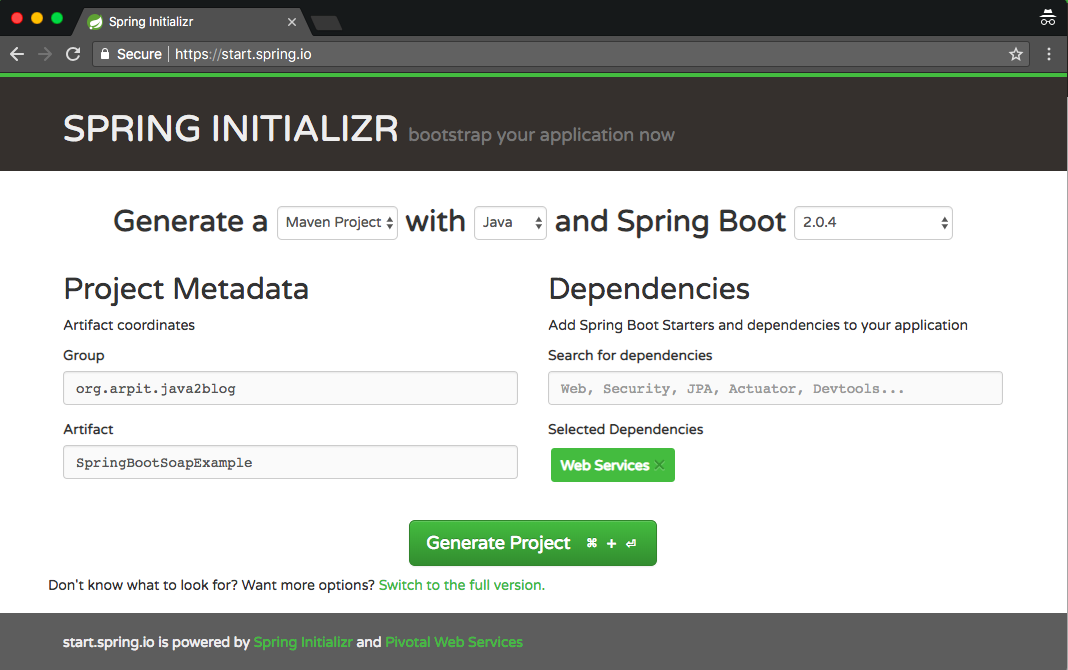
Step 1: Go to "https://start.spring.io/" and create spring boot projects as per below screenshot.
Step 2: Import the maven project in eclipse.
Add wsdl4j dependency
Step 3: Add wsdl4j dependency to the POM.
|
1 2 3 4 5 6 |
<dependency> <groupId>wsdl4j</groupId> <artifactId>wsdl4j</artifactId> </dependency> |
XSD file to define domain
step 4: Create a xsd file named "book.xsd" in resource folder. As we are creating contract first soap web services, we need to define XML schema file (XSD) that Spring-WS will export automatically as a WSDL.
We are creating book.xsd which will return book with its id, title and number of pages.
|
1 2 3 4 5 6 7 8 9 10 11 12 13 14 15 16 17 18 19 20 21 22 23 24 25 26 27 28 29 30 31 |
<xs:schema xmlns:xs="http://www.w3.org/2001/XMLSchema" xmlns:tns="https://www.java2blog.com/xml/book" targetNamespace="https://www.java2blog.com/xml/book" elementFormDefault="qualified"> <xs:element name="getBookRequest"> <xs:complexType> <xs:sequence> <xs:element name="id" type="xs:int" /> </xs:sequence> </xs:complexType> </xs:element> <xs:element name="getBookResponse"> <xs:complexType> <xs:sequence> <xs:element name="Book" type="tns:Book" /> </xs:sequence> </xs:complexType> </xs:element> <xs:complexType name="Book"> <xs:sequence> <xs:element name="id" type="xs:int" /> <xs:element name="title" type="xs:string" /> <xs:element name="pages" type="xs:long" /> </xs:sequence> </xs:complexType> </xs:schema> |
Generate domain classes based on XSD
Step 5: We will generate domain classes based on XSD now. We will use JAXB maven plugin to generate domain classes based on XSD.
Plugin configuration for maven
|
1 2 3 4 5 6 7 8 9 10 11 12 13 14 15 16 17 18 19 20 21 22 23 24 |
<plugin> <groupId>org.springframework.boot</groupId> <artifactId>spring-boot-maven-plugin</artifactId> </plugin> <plugin> <groupId>org.codehaus.mojo</groupId> <artifactId>jaxb2-maven-plugin</artifactId> <version>1.6</version> <executions> <execution> <id>xjc</id> <goals> <goal>xjc</goal> </goals> </execution> </executions> <configuration> <schemaDirectory>${project.basedir}/src/main/resources/</schemaDirectory> <outputDirectory>${project.basedir}/src/main/java</outputDirectory> <clearOutputDir>false</clearOutputDir> </configuration> </plugin> |
So when you run maven build, these domain classes will be generated.
Create Book repository with dummy data
Step 6: Create a BookRepository.java.This repository will provide dummy data to web service.
|
1 2 3 4 5 6 7 8 9 10 11 12 13 14 15 16 17 18 19 20 21 22 23 24 25 26 27 28 29 30 31 32 33 34 35 36 37 38 39 40 41 42 43 44 45 46 47 48 49 50 |
package org.arpit.java2blog; import javax.annotation.PostConstruct; import java.util.HashMap; import java.util.Map; import org.springframework.stereotype.Component; import org.springframework.util.Assert; import com.java2blog.xml.book.Book; @Component public class BookRepository { private static final Map<Integer, Book> books = new HashMap<>(); @PostConstruct public void initData() { Book javaBook = new Book(); javaBook.setId(1); javaBook.setTitle("Head first java"); javaBook.setPages(400); books.put(javaBook.getId(), javaBook); Book springBook = new Book(); springBook.setId(2); springBook.setTitle("Spring in action"); springBook.setPages(400); books.put(springBook.getId(), springBook); Book pythonBook = new Book(); pythonBook.setId(3); pythonBook.setTitle("Learning Python"); pythonBook.setPages(400); books.put(pythonBook.getId(), pythonBook); Book hiberanteBook = new Book(); hiberanteBook.setId(4); hiberanteBook.setTitle("Hibernate in action"); hiberanteBook.setPages(400); books.put(hiberanteBook.getId(), hiberanteBook); } public Book findBookById(int id) { Assert.notNull(id, "The book's name must not be null"); return books.get(id); } } |
Define Book service endpoint
step 7: To create Book service endpoint, we just need to annotate a POJO with Spring WS annotation to take care of SOAP request.
|
1 2 3 4 5 6 7 8 9 10 11 12 13 14 15 16 17 18 19 20 21 22 23 24 25 26 27 28 29 30 31 32 |
package org.arpit.java2blog; import org.springframework.beans.factory.annotation.Autowired; import org.springframework.ws.server.endpoint.annotation.Endpoint; import org.springframework.ws.server.endpoint.annotation.PayloadRoot; import org.springframework.ws.server.endpoint.annotation.RequestPayload; import org.springframework.ws.server.endpoint.annotation.ResponsePayload; import com.java2blog.xml.book.GetBookRequest; import com.java2blog.xml.book.GetBookResponse; @Endpoint public class BookEndpoint { private static final String NAMESPACE_URI = "https://www.java2blog.com/xml/book"; private BookRepository bookRepository; @Autowired public BookEndpoint(BookRepository bookRepository) { this.bookRepository = bookRepository; } @PayloadRoot(namespace = NAMESPACE_URI, localPart = "getBookRequest") @ResponsePayload public GetBookResponse getCountry(@RequestPayload GetBookRequest request) { GetBookResponse response = new GetBookResponse(); response.setBook(bookRepository.findBookById(request.getId())); return response; } } |
Let’s see more details about above annotations.
@Endpoint: This annotation is used to register the class with Spring WS for processing incoming SOAP request.
@PayloadRoot: This annotation helps Spring WS to pick handler method based on message’s namespace and localPart.
@ResponsePayload: This annotation indicates that incoming message will be mapped to method’s request parameter.
@ResponsePayload: This annotation is used to Spring WS map the return value to the response payload.
Define web service configuration
step 8: Create a new class named WebServiceConfiguration.java which will contain Spring Web services related beans configurations.
|
1 2 3 4 5 6 7 8 9 10 11 12 13 14 15 16 17 18 19 20 21 22 23 24 25 26 27 28 29 30 31 32 33 34 35 36 37 38 39 40 41 42 |
package org.arpit.java2blog; import org.springframework.boot.web.servlet.ServletRegistrationBean; import org.springframework.context.ApplicationContext; import org.springframework.context.annotation.Bean; import org.springframework.context.annotation.Configuration; import org.springframework.core.io.ClassPathResource; import org.springframework.ws.config.annotation.EnableWs; import org.springframework.ws.config.annotation.WsConfigurerAdapter; import org.springframework.ws.transport.http.MessageDispatcherServlet; import org.springframework.ws.wsdl.wsdl11.DefaultWsdl11Definition; import org.springframework.xml.xsd.SimpleXsdSchema; import org.springframework.xml.xsd.XsdSchema; @EnableWs @Configuration public class WebServiceConfiguration extends WsConfigurerAdapter { @Bean public ServletRegistrationBean messageDispatcherServlet(ApplicationContext applicationContext) { MessageDispatcherServlet servlet = new MessageDispatcherServlet(); servlet.setApplicationContext(applicationContext); servlet.setTransformWsdlLocations(true); return new ServletRegistrationBean(servlet, "/ws/*"); } @Bean(name = "booksWsdl") public DefaultWsdl11Definition defaultWsdl11Definition(XsdSchema booksSchema) { DefaultWsdl11Definition wsdl11Definition = new DefaultWsdl11Definition(); wsdl11Definition.setPortTypeName("BooksPort"); wsdl11Definition.setLocationUri("/ws"); wsdl11Definition.setTargetNamespace("https://www.java2blog.com/xml/book"); wsdl11Definition.setSchema(booksSchema); return wsdl11Definition; } @Bean public XsdSchema booksSchema() { return new SimpleXsdSchema(new ClassPathResource("book.xsd")); } } |
Spring Ws usees MessageDispatcherServlet to handle SOAP message. It is important to set ApplicationContext, otherwise Spring WS will not be able to detect Spring bean automatically.
DefaultWsdl11Definition exposes a Standard WSDL using XsdSchema.
Please note that bean name for defaultWsdl11Definition defines URL for WSDL, so WSDL URL with above configuration will be
http://localhost:8080/ws/booksWsdl.wsdl.
step 9: Create the main java class named “SpringBootSoapExampleApplication.java” which will have main method.
|
1 2 3 4 5 6 7 8 9 10 11 12 13 14 |
package org.arpit.java2blog; import org.springframework.boot.SpringApplication; import org.springframework.boot.autoconfigure.SpringBootApplication; @SpringBootApplication public class SpringBootSoapExampleApplication { public static void main(String[] args) { SpringApplication.run(SpringBootSoapExampleApplication.class, args); } } |
Run the applicaton
Step 10: Run the application
When you run above application, you will get below output:
…
2018-09-16 20:30:37.597 INFO 24898 — [ main] o.s.w.s.handler.SimpleUrlHandlerMapping : Mapped URL path [/**] onto handler of type [class org.springframework.web.servlet.resource.ResourceHttpRequestHandler] 2018-09-16 20:30:38.157 INFO 24898 — [ main] o.s.j.e.a.AnnotationMBeanExporter : Registering beans for JMX exposure on startup
2018-09-16 20:30:38.348 INFO 24898 — [ main] o.s.b.w.embedded.tomcat.TomcatWebServer : Tomcat started on port(s): 8080 (http) with context path ”
2018-09-16 20:30:38.355 INFO 24898 — [ main] o.a.j.SpringBootSoapExampleApplication : Started SpringBootSoapExampleApplication in 11.127 seconds (JVM running for 14.293)
Test WSDL URL
Step 11: Check WSDL URL.
URL : http://localhost:8080/ws/booksWsdl.wsdl
Hit the above URL and you will get below WSDL file.
|
1 2 3 4 5 6 7 8 9 10 11 12 13 14 15 16 17 18 19 20 21 22 23 24 25 26 27 28 29 30 31 32 33 34 35 36 37 38 39 40 41 42 43 44 45 46 47 48 49 50 51 52 53 54 55 56 57 58 59 60 61 62 63 64 65 66 |
<wsdl:definitions xmlns:wsdl="http://schemas.xmlsoap.org/wsdl/" xmlns:sch="https://www.java2blog.com/xml/book" xmlns:soap="http://schemas.xmlsoap.org/wsdl/soap/" xmlns:tns="https://www.java2blog.com/xml/book" targetNamespace="https://www.java2blog.com/xml/book"> <wsdl:types> <xs:schema xmlns:xs="http://www.w3.org/2001/XMLSchema" elementFormDefault="qualified" targetNamespace="https://www.java2blog.com/xml/book"> <xs:element name="getBookRequest"> <xs:complexType> <xs:sequence> <xs:element name="id" type="xs:int" /> </xs:sequence> </xs:complexType> </xs:element> <xs:element name="getBookResponse"> <xs:complexType> <xs:sequence> <xs:element name="Book" type="tns:Book" /> </xs:sequence> </xs:complexType> </xs:element> <xs:complexType name="Book"> <xs:sequence> <xs:element name="id" type="xs:int" /> <xs:element name="title" type="xs:string" /> <xs:element name="pages" type="xs:long" /> </xs:sequence> </xs:complexType> </xs:schema> </wsdl:types> <wsdl:message name="getBookRequest"> <wsdl:part element="tns:getBookRequest" name="getBookRequest"> </wsdl:part> </wsdl:message> <wsdl:message name="getBookResponse"> <wsdl:part element="tns:getBookResponse" name="getBookResponse"> </wsdl:part> </wsdl:message> <wsdl:portType name="BooksPort"> <wsdl:operation name="getBook"> <wsdl:input message="tns:getBookRequest" name="getBookRequest"> </wsdl:input> <wsdl:output message="tns:getBookResponse" name="getBookResponse"> </wsdl:output> </wsdl:operation> </wsdl:portType> <wsdl:binding name="BooksPortSoap11" type="tns:BooksPort"> <soap:binding style="document" transport="http://schemas.xmlsoap.org/soap/http" /> <wsdl:operation name="getBook"> <soap:operation soapAction="" /> <wsdl:input name="getBookRequest"> <soap:body use="literal" /> </wsdl:input> <wsdl:output name="getBookResponse"> <soap:body use="literal" /> </wsdl:output> </wsdl:operation> </wsdl:binding> <wsdl:service name="BooksPortService"> <wsdl:port binding="tns:BooksPortSoap11" name="BooksPortSoap11"> <soap:address location="http://localhost:8080/ws" /> </wsdl:port> </wsdl:service> </wsdl:definitions> |
Test Spring soap web service
Step 11: Test application on SOAP UI
Create a project on SOAP UI using above WSDL file and test the application.
SOAP request
|
1 2 3 4 5 6 7 8 9 10 |
<soapenv:Envelope xmlns:soapenv="http://schemas.xmlsoap.org/soap/envelope/" xmlns:book="https://www.java2blog.com/xml/book"> <soapenv:Header/> <soapenv:Body> <book:getBookRequest> <book:id>3</book:id> </book:getBookRequest> </soapenv:Body> </soapenv:Envelope> |
SOAP response
|
1 2 3 4 5 6 7 8 9 10 11 12 13 14 |
<SOAP-ENV:Envelope xmlns:SOAP-ENV="http://schemas.xmlsoap.org/soap/envelope/"> <SOAP-ENV:Header/> <SOAP-ENV:Body> <ns2:getBookResponse xmlns:ns2="https://www.java2blog.com/xml/book"> <ns2:Book> <ns2:id>3</ns2:id> <ns2:title>Learning Python</ns2:title> <ns2:pages>400</ns2:pages> </ns2:Book> </ns2:getBookResponse> </SOAP-ENV:Body> </SOAP-ENV:Envelope> |
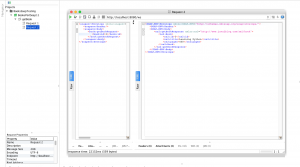
Here is the screenshot from SOAP UI.
Source code
That’s all about Spring Boot SOAP Webservice Example.
Hi … thanks for your tutorial. plz check this both the places written @ResponsePayload
instead of one @RequestPayload.
@ResponsePayload: This annotation indicates that incoming message will be mapped to method’s request parameter.
@ResponsePayload: This annotation is used to Spring WS map the return value to the response payload.