Table of Contents
In this post, we will see Spring MVC file upload example. We have already seen struts 2 file upload example.
Spring MVC tutorial:
- Spring MVC hello world example
- Spring MVC Hibernate MySQL example
- Spring MVC interceptor example
- Spring MVC angularjs example
- Spring MVC @RequestMapping example
- Spring Component,Service, Repository and Controller example
- Spring MVC @ModelAttribute annotation example
- Spring MVC @RestController annotation example
- Spring MultiActionController Example
- Spring MVC ModelMapSpring MVC file upload example
- Spring restful web service example
- Spring restful web service json example
- Spring Restful web services CRUD example
- Spring security hello world example
- Spring security custom login form example
Spring MVC uses Apache common FileUpload API to upload file. It is very easy to configure file upload in Spring MVC.
Project structure for below example:

Steps for Spring MVC file upload example:
1) Create dynamic web project using maven named “SpringMVCFileUploadExample”.
2) Maven dependencies
It requires spring dependency as we have put in spring mvc hello world example. It requires apache common io jars too, so we need to put following dependency for it.
|
1 2 3 4 5 6 7 8 9 10 11 12 13 14 15 16 |
<!-- Apache Common io dependencies --> <!-- Apache Commons FileUpload --> <dependency> <groupId>commons-fileupload</groupId> <artifactId>commons-fileupload</artifactId> <version>1.3.1</version> </dependency> <!-- Apache Commons IO --> <dependency> <groupId>commons-io</groupId> <artifactId>commons-io</artifactId> <version>2.4</version> </dependency> |
So pom.xml will be as below
|
1 2 3 4 5 6 7 8 9 10 11 12 13 14 15 16 17 18 19 20 21 22 23 24 25 26 27 28 29 30 31 32 33 34 35 36 37 38 39 40 41 42 43 44 45 46 47 48 49 50 51 52 53 54 55 56 57 58 59 60 61 62 63 64 65 66 67 68 69 70 71 72 |
<project xmlns="http://maven.apache.org/POM/4.0.0" xmlns:xsi="http://www.w3.org/2001/XMLSchema-instance" xsi:schemaLocation="http://maven.apache.org/POM/4.0.0 http://maven.apache.org/maven-v4_0_0.xsd"> <modelVersion>4.0.0</modelVersion> <groupId>org.arpit.java2blog</groupId> <artifactId>SpringMVCFileUploadExample</artifactId> <packaging>war</packaging> <version>0.0.1-SNAPSHOT</version> <name>SpringMVCFileUploadExample Maven Webapp</name> <url>http://maven.apache.org</url> <dependencies> <dependency> <groupId>junit</groupId> <artifactId>junit</artifactId> <version>3.8.1</version> <scope>test</scope> </dependency> <dependency> <groupId>javax.servlet</groupId> <artifactId>javax.servlet-api</artifactId> <version>3.1.0</version> </dependency> <!-- Spring dependency --> <dependency> <groupId>org.springframework</groupId> <artifactId>spring-core</artifactId> <version>${spring.version}</version> </dependency> <dependency> <groupId>org.springframework</groupId> <artifactId>spring-webmvc</artifactId> <version>${spring.version}</version> </dependency> <!-- Apache Common io dependencies --> <!-- Apache Commons FileUpload --> <dependency> <groupId>commons-fileupload</groupId> <artifactId>commons-fileupload</artifactId> <version>1.3.1</version> </dependency> <!-- Apache Commons IO --> <dependency> <groupId>commons-io</groupId> <artifactId>commons-io</artifactId> <version>2.4</version> </dependency> </dependencies> <build> <finalName>SpringMVCFileUploadExample</finalName> <plugins> <plugin> <groupId>org.apache.maven.plugins</groupId> <artifactId>maven-compiler-plugin</artifactId> <version>3.1</version> <configuration> <source>${jdk.version}</source> <target>${jdk.version}</target> </configuration> </plugin> </plugins> </build> <properties> <spring.version>4.2.1.RELEASE</spring.version> <jdk.version>1.7</jdk.version> </properties> </project> |
3) Create model,controller and validator
Create a class model called “FileUpload.java” in packge org.arpit.java2blog.model and it will have variable of type MultiFilePart.
|
1 2 3 4 5 6 7 8 9 10 11 12 13 14 15 16 17 |
package org.arpit.java2blog.model; import org.springframework.web.multipart.MultipartFile; public class FileUpload { MultipartFile file; public MultipartFile getFile() { return file; } public void setFile(MultipartFile file) { this.file = file; } } |
Create class FileUploadController.java in package org.arpit.java2blog.controller . It is spring controller and to understand more above controller, please go through Spring MVC hello world example.
|
1 2 3 4 5 6 7 8 9 10 11 12 13 14 15 16 17 18 19 20 21 22 23 24 25 26 27 28 29 30 31 32 33 34 35 36 37 38 39 40 41 42 43 44 45 46 47 48 49 50 51 52 53 54 55 56 57 58 59 60 61 62 63 64 65 66 67 68 69 70 71 72 73 74 75 |
package org.arpit.java2blog.controller; import java.io.File; import java.io.FileOutputStream; import java.io.IOException; import java.io.InputStream; import java.io.OutputStream; import org.arpit.java2blog.model.FileUpload; import org.arpit.java2blog.validator.FileUploadValidator; import org.springframework.beans.factory.annotation.Autowired; import org.springframework.stereotype.Controller; import org.springframework.validation.BindingResult; import org.springframework.web.bind.annotation.ModelAttribute; import org.springframework.web.bind.annotation.RequestMapping; import org.springframework.web.multipart.MultipartFile; import org.springframework.web.servlet.ModelAndView; @Controller public class FileUploadController { @Autowired FileUploadValidator fileValidator; @RequestMapping("/fileUploadForm") public ModelAndView getUploadForm( @ModelAttribute("uploadedFile") FileUpload uploadedFile, BindingResult result) { return new ModelAndView("fileUploadForm"); } // When click on submit, below method will get called @RequestMapping("/submitFileUpload") public ModelAndView fileUploaded( @ModelAttribute("uploadedFile") FileUpload uploadedFile, BindingResult result) { InputStream inputStream = null; OutputStream outputStream = null; // Getting uploaded file MultipartFile file = uploadedFile.getFile(); fileValidator.validate(uploadedFile, result); String fileName = file.getOriginalFilename(); // If it has error, redirect it to same page if (result.hasErrors()) { return new ModelAndView("fileUploadForm"); } try { inputStream = file.getInputStream(); File newFile = new File("/Users/Arpit/Documents/SpringMVCUploadedFiles/" + fileName); if (!newFile.exists()) { newFile.createNewFile(); } outputStream = new FileOutputStream(newFile); int read = 0; byte[] bytes = new byte[1024]; while ((read = inputStream.read(bytes)) != -1) { outputStream.write(bytes, 0, read); } } catch (IOException e) { // TODO Auto-generated catch block e.printStackTrace(); } return new ModelAndView("fileUploadSuccess", "fileName", fileName); } } |
We need validator for validations such as no files selected. Create validator FileUploadValidator.java in package org.arpit.java2blog.validator
|
1 2 3 4 5 6 7 8 9 10 11 12 13 14 15 16 17 18 19 20 21 22 23 24 25 26 27 |
package org.arpit.java2blog.validator; import org.arpit.java2blog.model.FileUpload; import org.springframework.validation.Errors; import org.springframework.validation.Validator; public class FileUploadValidator implements Validator{ @Override public boolean supports(Class clazz) { //just validate the FileUpload instances return FileUpload.class.isAssignableFrom(clazz); } @Override public void validate(Object target, Errors errors) { FileUpload file = (FileUpload)target; if(file.getFile().getSize()==0){ errors.rejectValue("file", "uploadForm.selectFile", "Please select a file!"); } } } |
4) Spring configuration
It will have simple web.xml for spring as in hello world example.
|
1 2 3 4 5 6 7 8 9 10 11 12 13 14 15 16 17 18 19 20 21 22 23 |
<web-app xmlns="http://java.sun.com/xml/ns/javaee" xmlns:xsi="http://www.w3.org/2001/XMLSchema-instance" xsi:schemaLocation="http://java.sun.com/xml/ns/javaee http://java.sun.com/xml/ns/javaee/web-app_3_0.xsd" version="3.0"> <display-name>Archetype Created Web Application</display-name> <welcome-file-list> <welcome-file>index.jsp</welcome-file> </welcome-file-list> <servlet> <servlet-name>springmvc-dispatcher</servlet-name> <servlet-class> org.springframework.web.servlet.DispatcherServlet </servlet-class> <load-on-startup>1</load-on-startup> </servlet> <servlet-mapping> <servlet-name>springmvc-dispatcher</servlet-name> <url-pattern>/</url-pattern> </servlet-mapping> </web-app> |
We need to change in “springmvc-dispatcher-servlet.xml” as below
|
1 2 3 4 5 6 7 8 9 10 11 12 13 14 15 16 17 18 19 20 21 22 23 24 25 26 27 |
<beans xmlns="http://www.springframework.org/schema/beans" xmlns:context="http://www.springframework.org/schema/context" xmlns:mvc="http://www.springframework.org/schema/mvc" xmlns:xsi="http://www.w3.org/2001/XMLSchema-instance" xsi:schemaLocation=" http://www.springframework.org/schema/beans http://www.springframework.org/schema/beans/spring-beans-3.0.xsd http://www.springframework.org/schema/context http://www.springframework.org/schema/context/spring-context-3.0.xsd http://www.springframework.org/schema/mvc http://www.springframework.org/schema/mvc/spring-mvc-3.0.xsd"> <context:component-scan base-package="org.arpit.java2blog.controller" /> <bean class="org.springframework.web.servlet.view.InternalResourceViewResolver"> <property name="prefix"> <value>/WEB-INF/JSP/</value> </property> <property name="suffix"> <value>.jsp</value> </property> </bean> <!-- Validator --> <bean id="fileValidator" class="org.arpit.java2blog.validator.FileUploadValidator" /> <bean id="multipartResolver" class="org.springframework.web.multipart.commons.CommonsMultipartResolver" /> <mvc:annotation-driven/> </beans> |
We need to declare multipartResolver bean in above file to enable file upload. We have also put bean entry of validator.
5) Views
Finally create views for file upload form and file upload success page. Create fileUploadForm.jsp in /WEB-INF/JSP/ folder
|
1 2 3 4 5 6 7 8 9 10 11 12 13 14 15 16 17 18 19 20 21 22 23 24 25 26 27 28 29 30 31 32 33 34 35 |
<%@ taglib uri="http://www.springframework.org/tags/form" prefix="form"%> <html> <head> <script type="text/javascript" src="jquery-1.2.6.min.js"></script> <title>Spring MVC file upload</title> </head> <body> <center> <h2>Spring MVC file upload</h2> <h3>Please select a file to upload !</h3> <form:form method="post" enctype="multipart/form-data" modelAttribute="uploadedFile" action="submitFileUpload.htm"> <table> <tr> <td>Upload File: </td> <td><input type="file" name="file" /> </td> <td style="color: red; font-style: italic;"><form:errors path="file" /> </td> </tr> <tr> <td> </td> <td><input type="submit" value="Upload" /> </td> <td> </td> </tr> </table> </form:form> </center> </body> </html> |
create filUploadSuccess.jsp /WEB-INF/JSP/ folder
|
1 2 3 4 5 6 7 8 9 10 11 12 13 |
<%@ taglib prefix="form" uri="http://www.springframework.org/tags/form"%> <html> <body> <h2>Spring MVC file upload example</h2> FileName : " <strong> ${fileName} </strong>" - Uploaded Successful. </body> </html> |
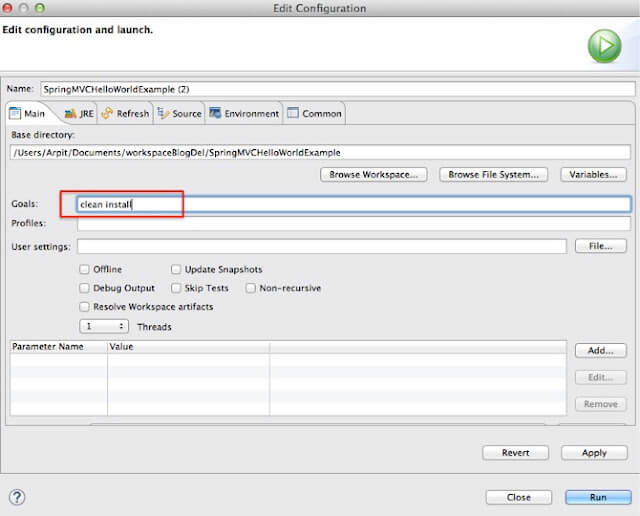
6) Its time for maven build
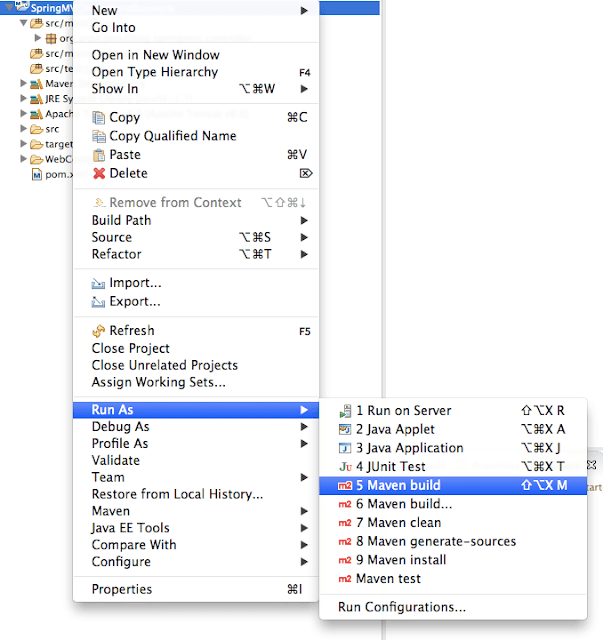
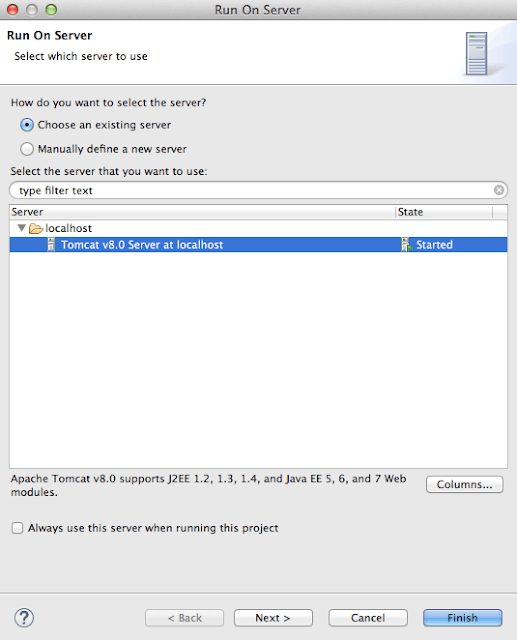
7) Run the application
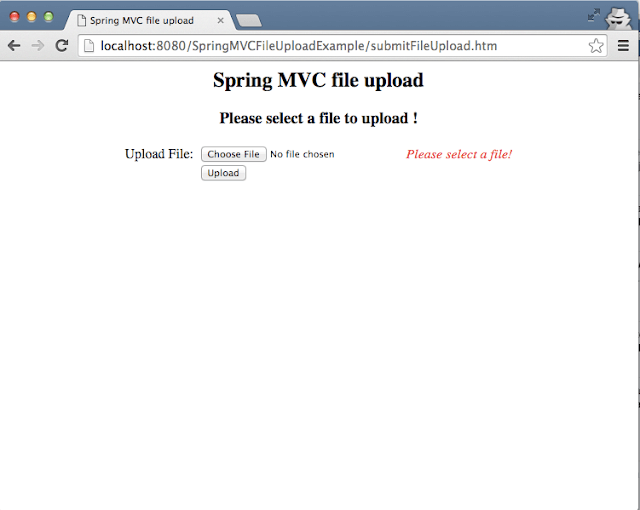
URL : http://localhost:8080/SpringMVCFileUploadExample/fileUploadForm.htm
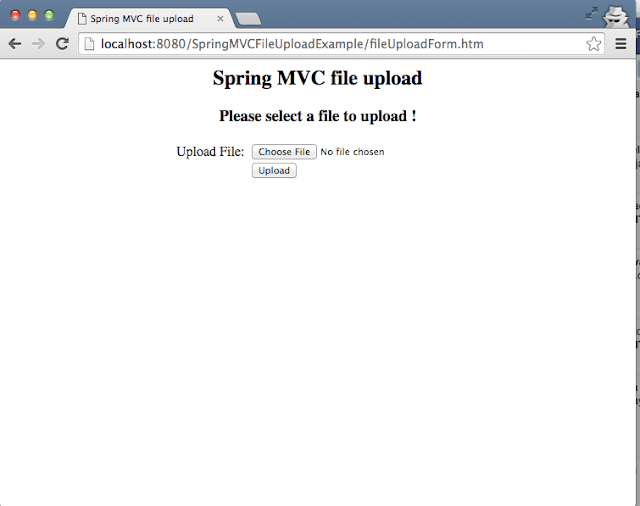
If you directly click on upload button without selecting any file, it will give you error as “Please select a file”
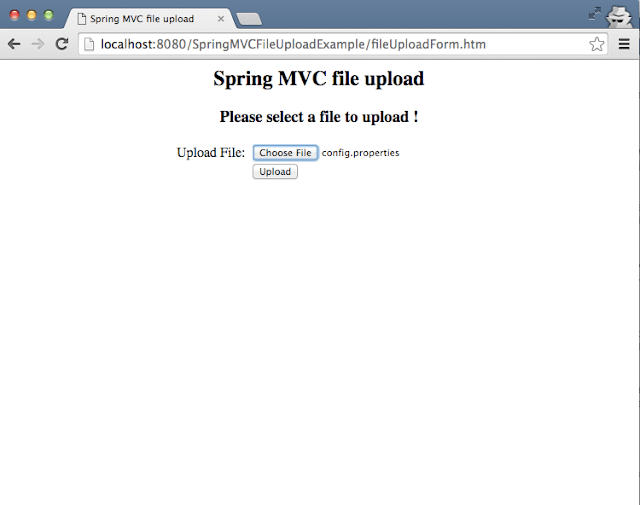
Lets upload “config.properties”
If your file is successfully uploaded, you will see below screen.
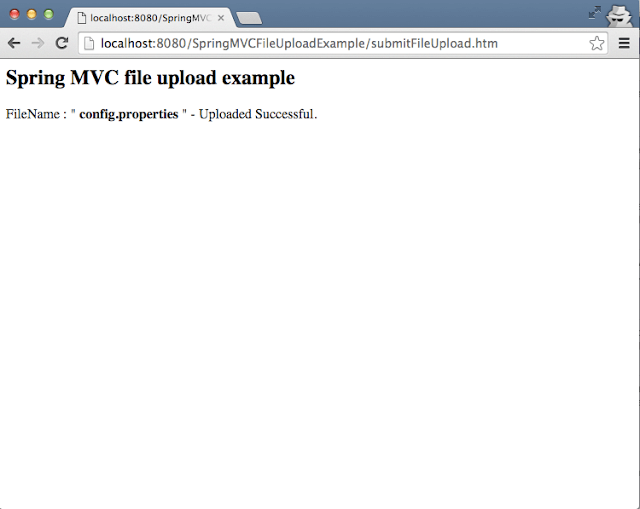
You can check in the folder whose path you have given in above application.

8) Source code
Bingo!! We are done with Spring MVC file upload example.