Table of Contents
Spring MVC tutorial:
- Spring MVC hello world example
- Spring MVC Hibernate MySQL example
- Spring MVC interceptor example
- Spring MVC angularjs example
- Spring MVC @RequestMapping example
- Spring Component,Service, Repository and Controller example
- Spring MVC @ModelAttribute annotation example
- Spring MVC @RestController annotation example
- Spring MultiActionController Example
- Spring MVC ModelMap
- Spring MVC file upload example
- Spring restful web service example
- Spring restful web service json example
- Spring Restful web services CRUD example
- Spring security hello world example
- Spring security custom login form example
Spring MultiActionController is used to map similar actions to single controller. So If you use MultiActionController class, you do not need to create new controller class for each action.
For example: When we login to internet banking, there is an option to add and delete payee. So we can use single PayeeController to perform similar actions such as add and delete.
As per spring docs, Method handler have to follow structure:
|
1 2 3 |
public (ModelAndView | Map | String | void) actionName(HttpServletRequest request, HttpServletResponse response, [,HttpSession] [,AnyObject]); |
Example:
Prerequisite:
You need to create spring mvc hello world example first.
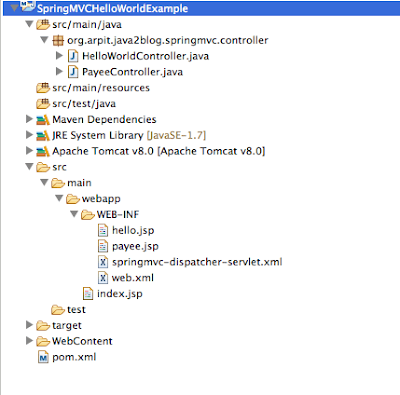
Once you are done with spring mvc sample project. We need to add or modify following files.
- Add a controller class named “PayeeController,java “
- Modify index.jsp
- Add new file named “payee.jsp” in /WEB-INF/ folder.
Thats all we need to do to demonstrate Spring MultiActionController example.
1) create Controller named “PayeeController.java” in org.arpit.java2blog.java2blog.springmvc.controller
|
1 2 3 4 5 6 7 8 9 10 11 12 13 14 15 16 17 18 19 20 21 22 23 24 |
package org.arpit.java2blog.springmvc.controller; import javax.servlet.http.HttpServletRequest; import javax.servlet.http.HttpServletResponse; import org.springframework.stereotype.Controller; import org.springframework.web.bind.annotation.RequestMapping; import org.springframework.web.servlet.ModelAndView; @Controller public class PayeeController { @RequestMapping("/payee/add.htm") public ModelAndView add(HttpServletRequest request, HttpServletResponse response) throws Exception { return new ModelAndView("payee", "message", "Payee Added"); } @RequestMapping("/payee/delete.htm") public ModelAndView delete(HttpServletRequest request, HttpServletResponse response) throws Exception { return new ModelAndView("payee", "message", "Payee Deleted"); } } |
As you can see here, you do not need to extend MultiAction class explicitly if you are using @controller annotation.
2) Modify index.jsp
|
1 2 3 4 5 6 7 8 9 10 11 12 13 14 15 |
<%@ page language="java" contentType="text/html; charset=UTF-8" pageEncoding="UTF-8"%> <!DOCTYPE html PUBLIC "-//W3C//DTD HTML 4.01 Transitional//EN" "http://www.w3.org/TR/html4/loose.dtd"> <html> <head> <meta http-equiv="Content-Type" content="text/html; charset=UTF-8"> <title>Spring MVC multiActionControllerExample</title> </head> <body> Add Payee | Delete Payee </body> </html> |
3)Create payee.jsp in /WEB_INF folder.
|
1 2 3 4 5 6 7 8 9 10 11 12 13 14 |
<%@ page language="java" contentType="text/html; charset=UTF-8" pageEncoding="UTF-8"%> <!DOCTYPE html PUBLIC "-//W3C//DTD HTML 4.01 Transitional//EN" "http://www.w3.org/TR/html4/loose.dtd"> <html> <head> <meta http-equiv="Content-Type" content="text/html; charset=UTF-8"> <title>Payee</title> </head> <body> ${message} </body> </html> |
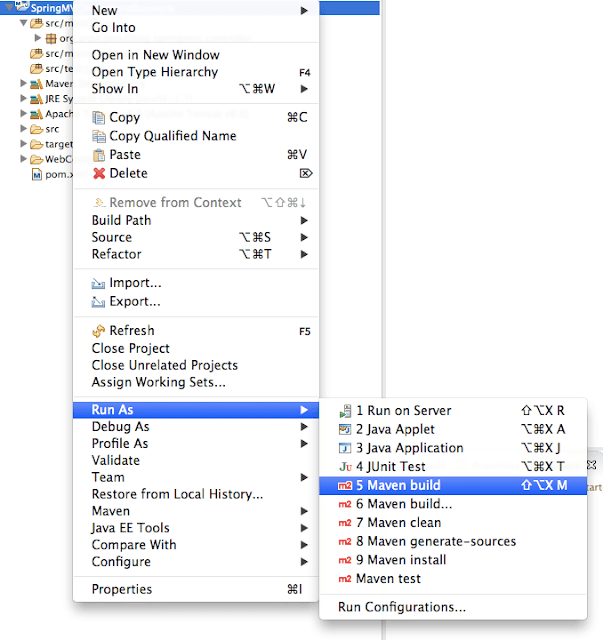
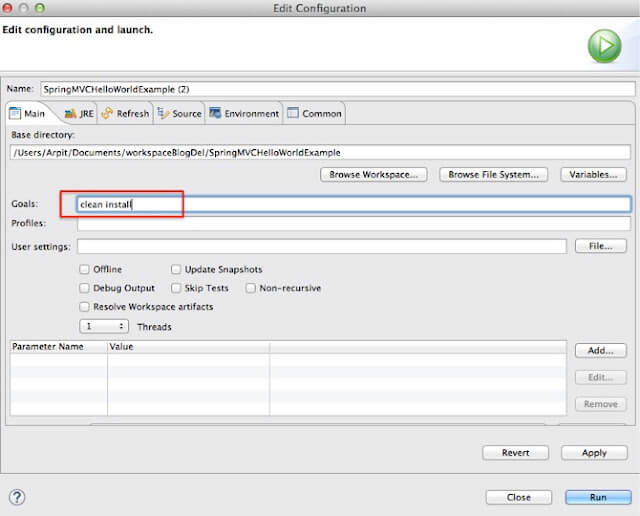
4) It ‘s time to do maven build.
Run the application
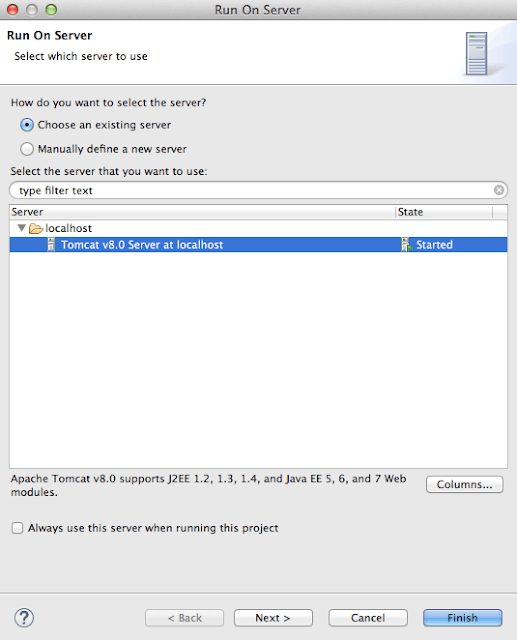
7) You will see below screen:
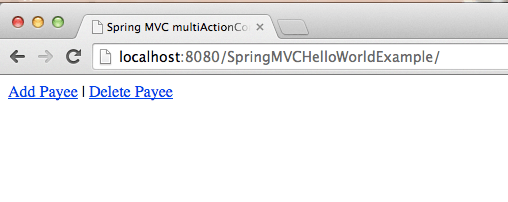
When you click on Add Payee link, you will get below screen


