In this tutorial, we are going to see about JHipster.
JHipster is a powerful development tool to generate, create and deploy spring boot and angular js or react js application faster. It will create an application for you in no time and it provides a lot of out of the box features such as logging, metrics, health etc.

Table of Contents
I will demonstrate similar application which I have demonstrated for Spring MVC angular js example and you will realize how much easier it is to bootstrap Spring boot + angular/react.
Step 1: Quick installation
- Install Java 8 from the Oracle website.
- Install Node.js from the Node.js website (please use an LTS 64-bit version, non-LTS versions are not supported)
- Install Yarn from the Yarn website
- Open terminal
- If you want to use the JHipster Marketplace, install Yeoman:
yarn global add yo - Install JHipster with command:
yarn global add generator-jhipster
Once you are done with the above installation, let’s create sample project.
Step 2: Project setup
- Open terminal and execute below commands
- mkdir JhipsterHelloWorld
- cd JhipsterHelloWorld
- jhipster
This will ask you for lot of options to choose from.
? Which *type* of application would you like to create? Monolithic application (recommended for simple projects)
? What is the base name of your application? JhipsterHelloWorld
? What is your default Java package name? org.arpit.java2blog
? Do you want to use the JHipster Registry to configure, monitor and scale your application? No
? Which *type* of authentication would you like to use? HTTP Session Authentication (stateful, default Spring Security mechanism)
? Which *type* of database would you like to use? SQL (H2, MySQL, MariaDB, PostgreSQL, Oracle, MSSQL)
? Which *production* database would you like to use? MySQL
? Which *development* database would you like to use? H2 with in-memory persistence
? Do you want to use the Spring cache abstraction? Yes, with the Ehcache implementation (local cache, for a single node)
? Do you want to use Hibernate 2nd level cache? No
? Would you like to use Maven or Gradle for building the backend? Maven
? Which other technologies would you like to use?
? Which *Framework* would you like to use for the client? Angular 6
? Would you like to enable *SASS* support using the LibSass stylesheet preprocessor? No
? Would you like to enable internationalization support? No
? Besides JUnit and Jest, which testing frameworks would you like to use?
? Would you like to install other generators from the JHipster Marketplace? No
Once you are done with above steps,it will build your project.
Step 3: Import project in IDE
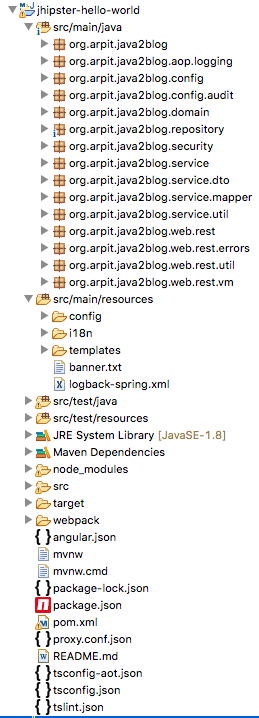
We need to import the project in eclipse as maven project. Project will look like as below.
Back-end
- Java code is contained in the src/main/java folder as always
- The src/main/resources folder contains static resources used by java code. It also contains internationalization files and other configuration files.
- You can find Unit and integration tests in the src/test/java folder
Front-end
- src/main/webapp is root folder for front hand.
- The app folder contains AngularJS modules
- i18n contains the internationalization files for the front end part
- Unit tests for frontend are in the src/test/javascript/spec folder
As you can see, Jhipster has created a lot of packages and files for you to get started.
Step 4: Run npm
We need to start node.js server before we proceed. Run below commands in IDE.
npm start
Step 5: Create Entity called Country
Entities are building blocks of hipster application. Entities actually represent business objects such as User, Customer etc.
Creating an entity is actually quite easy.You just need to execute below commands and follow the instructions.
Once you execute above command, you will get below options
Options:The entity Country is being created.Generating field #1? Do you want to add a field to your entity? Yes
? What is the name of your field? name
? What is the type of your field? String
? Do you want to add validation rules to your field? No================= Country =================
Fields
name (String)Generating field #2? Do you want to add a field to your entity? Yes
? What is the name of your field? population
? What is the type of your field? Long
? Do you want to add validation rules to your field? No================= Country =================
Fields
name (String)
population (Long)
Generating field #3
? Do you want to add a field to your entity? No
================= Country =================
Fields
name (String)
population (Long)
Generating relationships to other entities
? Do you want to add a relationship to another entity? No
================= Country =================
Fields
name (String)
population (Long)
? Do you want to use separate service class for your business logic? No, the REST controller should
use the repository directly
? Do you want pagination on your entity? No
Everything is configured, generating the entity…
Step 6: Build maven project
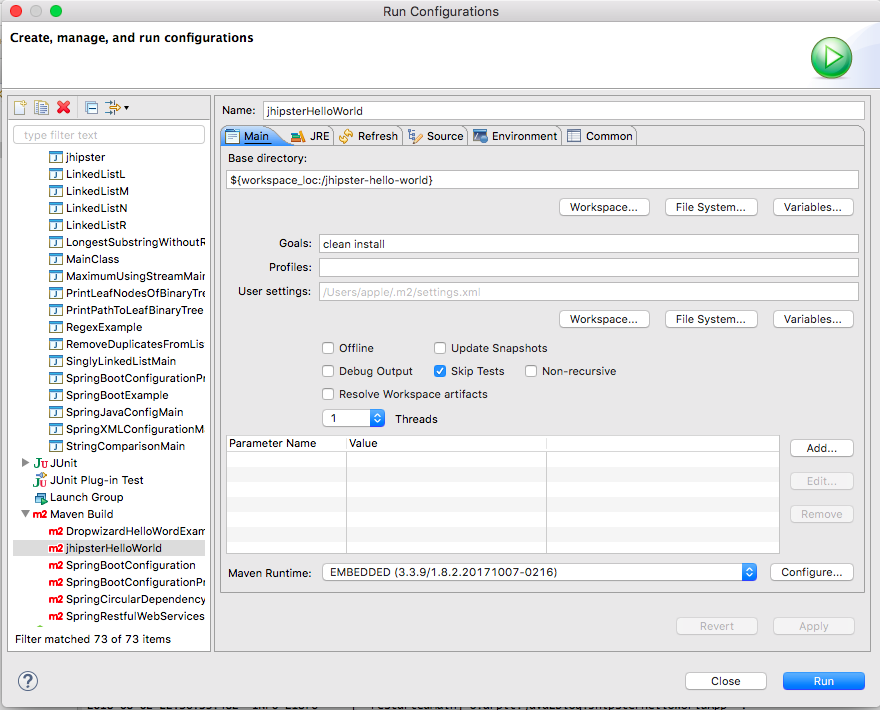
Build the maven project with "clean install" as goals.
Step 7: Run the project
go to src/main/java/org/arpit/java2blog and open JhipserHelloWorldApp.java
|
1 2 3 4 5 6 7 8 9 10 11 12 13 14 15 16 17 18 19 20 21 22 23 24 25 26 27 28 29 30 31 32 33 34 35 36 37 38 39 40 41 42 43 44 45 46 47 48 49 50 51 52 53 54 55 56 57 58 59 60 61 62 63 64 65 66 67 68 69 70 71 72 73 74 75 76 77 78 79 80 81 82 83 84 85 86 87 |
package org.arpit.java2blog; import org.arpit.java2blog.config.ApplicationProperties; import org.arpit.java2blog.config.DefaultProfileUtil; import io.github.jhipster.config.JHipsterConstants; import org.slf4j.Logger; import org.slf4j.LoggerFactory; import org.springframework.boot.SpringApplication; import org.springframework.boot.autoconfigure.SpringBootApplication; import org.springframework.boot.autoconfigure.liquibase.LiquibaseProperties; import org.springframework.boot.context.properties.EnableConfigurationProperties; import org.springframework.core.env.Environment; import javax.annotation.PostConstruct; import java.net.InetAddress; import java.util.Arrays; import java.util.Collection; @SpringBootApplication @EnableConfigurationProperties({LiquibaseProperties.class, ApplicationProperties.class}) public class JhipsterHelloWorldApp { private static final Logger log = LoggerFactory.getLogger(JhipsterHelloWorldApp.class); private final Environment env; public JhipsterHelloWorldApp(Environment env) { this.env = env; } /** * Initializes JhipsterHelloWorld. * <p> * Spring profiles can be configured with a program arguments --spring.profiles.active=your-active-profile * <p> * You can find more information on how profiles work with JHipster on <a href="https://www.jhipster.tech/profiles/">https://www.jhipster.tech/profiles/</a>. */ @PostConstruct public void initApplication() { Collection<String> activeProfiles = Arrays.asList(env.getActiveProfiles()); if (activeProfiles.contains(JHipsterConstants.SPRING_PROFILE_DEVELOPMENT) && activeProfiles.contains(JHipsterConstants.SPRING_PROFILE_PRODUCTION)) { log.error("You have misconfigured your application! It should not run " + "with both the 'dev' and 'prod' profiles at the same time."); } if (activeProfiles.contains(JHipsterConstants.SPRING_PROFILE_DEVELOPMENT) && activeProfiles.contains(JHipsterConstants.SPRING_PROFILE_CLOUD)) { log.error("You have misconfigured your application! It should not " + "run with both the 'dev' and 'cloud' profiles at the same time."); } } /** * Main method, used to run the application. * * @param args the command line arguments */ public static void main(String[] args) { SpringApplication app = new SpringApplication(JhipsterHelloWorldApp.class); DefaultProfileUtil.addDefaultProfile(app); Environment env = app.run(args).getEnvironment(); String protocol = "http"; if (env.getProperty("server.ssl.key-store") != null) { protocol = "https"; } String hostAddress = "localhost"; try { hostAddress = InetAddress.getLocalHost().getHostAddress(); } catch (Exception e) { log.warn("The host name could not be determined, using [[code]]czo5OlwibG9jYWxob3N0XCI7e1smKiZdfQ==[[/code]] as fallback"); } log.info("\n----------------------------------------------------------\n\t" + "Application '{}' is running! Access URLs:\n\t" + "Local: \t\t{}://localhost:{}\n\t" + "External: \t{}://{}:{}\n\t" + "Profile(s): \t{}\n----------------------------------------------------------", env.getProperty("spring.application.name"), protocol, env.getProperty("server.port"), protocol, hostAddress, env.getProperty("server.port"), env.getActiveProfiles()); } } |
If you notice, this class is annotated with @SpringBootApplication, so when you will run this class, it will be executed as Spring boot application.
When you run above java class, you will get below output:
22:02:31.640 [main] DEBUG org.springframework.boot.devtools.settings.DevToolsSettings – Included patterns for restart : [] 22:02:31.645 [main] DEBUG org.springframework.boot.devtools.settings.DevToolsSettings – Excluded patterns for restart : [/spring-boot-actuator/target/classes/, /spring-boot-devtools/target/classes/, /spring-boot/target/classes/, /spring-boot-starter-[\w-]+/, /spring-boot-autoconfigure/target/classes/, /spring-boot-starter/target/classes/] 22:02:31.646 [main] DEBUG org.springframework.boot.devtools.restart.ChangeableUrls – Matching URLs for reloading : [file:/Users/apple/JhipsterHelloWorld/target/classes/]██╗ ██╗ ██╗ ████████╗ ███████╗ ██████╗ ████████╗ ████████╗ ███████╗
██║ ██║ ██║ ╚══██╔══╝ ██╔═══██╗ ██╔════╝ ╚══██╔══╝ ██╔═════╝ ██╔═══██╗
██║ ████████║ ██║ ███████╔╝ ╚█████╗ ██║ ██████╗ ███████╔╝
██╗ ██║ ██╔═══██║ ██║ ██╔════╝ ╚═══██╗ ██║ ██╔═══╝ ██╔══██║
╚██████╔╝ ██║ ██║ ████████╗ ██║ ██████╔╝ ██║ ████████╗ ██║ ╚██╗
╚═════╝ ╚═╝ ╚═╝ ╚═══════╝ ╚═╝ ╚═════╝ ╚═╝ ╚═══════╝ ╚═╝ ╚═╝:: JHipster 🤓 :: Running Spring Boot 2.0.3.RELEASE ::
:: https://www.jhipster.tech ::2018-08-01 22:02:34.293 INFO 18268 — [ restartedMain] o.arpit.java2blog.JhipsterHelloWorldApp : Starting JhipsterHelloWorldApp on apples-MacBook-Air.local with PID 18268 (/Users/apple/JhipsterHelloWorld/target/classes started by apple in /Users/apple/JhipsterHelloWorld)
2018-08-01 22:02:34.296 DEBUG 18268 — [ restartedMain] o.arpit.java2blog.JhipsterHelloWorldApp : Running with Spring Boot v2.0.3.RELEASE, Spring v5.0.7.RELEASE
2018-08-01 22:02:34.299 INFO 18268 — [ restartedMain] o.arpit.java2blog.JhipsterHelloWorldApp : The following profiles are active: dev,swagger
2018-08-01 22:02:39.098 DEBUG 18268 — [ restartedMain] o.a.java2blog.config.AsyncConfiguration : Creating Async Task Executor
2018-08-01 22:02:40.480 DEBUG 18268 — [ restartedMain] o.a.j.config.MetricsConfiguration : Registering JVM gauges
2018-08-01 22:02:40.623 DEBUG 18268 — [ restartedMain] o.a.j.config.MetricsConfiguration : Monitoring the datasource
2018-08-01 22:02:40.625 DEBUG 18268 — [ restartedMain] o.a.j.config.MetricsConfiguration : Initializing Metrics JMX reporting
2018-08-01 22:02:42.621 DEBUG 18268 — [ restartedMain] o.a.j.config.LiquibaseConfiguration : Configuring Liquibase
2018-08-01 22:02:43.090 WARN 18268 — [orld-Executor-1] i.g.j.c.liquibase.AsyncSpringLiquibase : Starting Liquibase asynchronously, your database might not be ready at startup!
2018-08-01 22:02:47.858 DEBUG 18268 — [ restartedMain] o.arpit.java2blog.config.WebConfigurer : Registering CORS filter
2018-08-01 22:02:48.054 INFO 18268 — [ restartedMain] o.arpit.java2blog.config.WebConfigurer : Web application configuration, using profiles: dev
2018-08-01 22:02:48.055 DEBUG 18268 — [ restartedMain] o.arpit.java2blog.config.WebConfigurer : Initializing Metrics registries
2018-08-01 22:02:48.062 DEBUG 18268 — [ restartedMain] o.arpit.java2blog.config.WebConfigurer : Registering Metrics Filter
2018-08-01 22:02:48.063 DEBUG 18268 — [ restartedMain] o.arpit.java2blog.config.WebConfigurer : Registering Metrics Servlet
2018-08-01 22:02:48.069 DEBUG 18268 — [ restartedMain] o.arpit.java2blog.config.WebConfigurer : Initialize H2 console
2018-08-01 22:02:48.072 INFO 18268 — [ restartedMain] o.arpit.java2blog.config.WebConfigurer : Web application fully configured
2018-08-01 22:02:50.488 DEBUG 18268 — [ restartedMain] c.ehcache.core.Ehcache-usersByLogin : Initialize successful.
2018-08-01 22:02:50.545 DEBUG 18268 — [ restartedMain] c.ehcache.core.Ehcache-usersByEmail : Initialize successful.
2018-08-01 22:02:53.211 DEBUG 18268 — [ restartedMain] o.a.j.config.DatabaseConfiguration : Starting H2 database
2018-08-01 22:02:54.616 DEBUG 18268 — [ restartedMain] i.g.j.c.apidoc.SwaggerAutoConfiguration : Starting Swagger
2018-08-01 22:02:54.639 DEBUG 18268 — [ restartedMain] i.g.j.c.apidoc.SwaggerAutoConfiguration : Started Swagger in 22 ms
2018-08-01 22:02:56.567 INFO 18268 — [ restartedMain] o.arpit.java2blog.JhipsterHelloWorldApp : Started JhipsterHelloWorldApp in 24.899 seconds (JVM running for 26.317)
2018-08-01 22:02:56.580 INFO 18268 — [ restartedMain] o.arpit.java2blog.JhipsterHelloWorldApp :
———————————————————-
Application ‘JhipsterHelloWorld’ is running! Access URLs:
Local: http://localhost:8080
External: http://192.168.2.6:8080
Profile(s): [dev, swagger] ———————————————————-
Step 8: Browse user interface
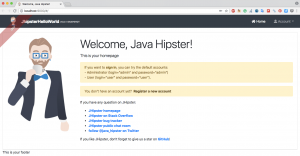
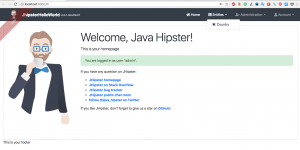
Go to "localhost:9000", you will see below screen.
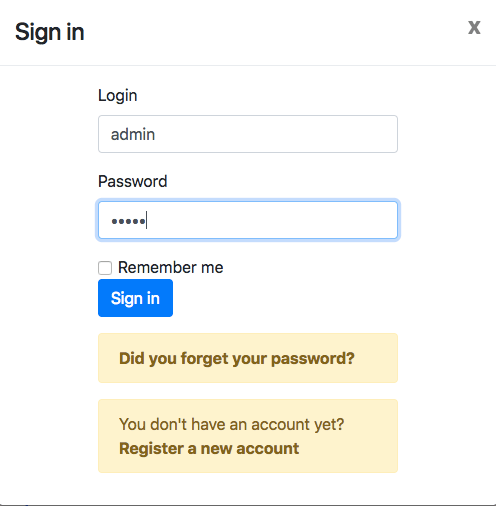
Click on Account -> "sign in" and login with
Username: admin
Password: admin
Click on Entities-> Country
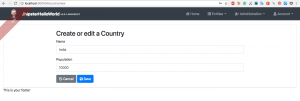
Then you will see below screen, click on "create new Country" button

Put
Name: India
Population: 10000
and click on "save"
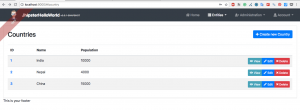
I have also added Nepal and china as Country.
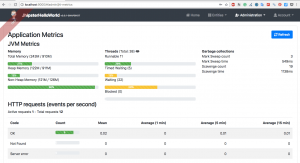
Click on Administration -> metrics, you will see below screen.
Click on Administration -> health, you will see below screen.

Click on Administration -> API, you will see below screen.
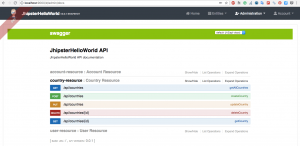
Click on Administration -> Database and Connet to H2 database.
When we put query as "Select * from Country", you will be able to see 3 records in Country table.

As you can see, we did not write even any code, but still able to get lots of functionalities out of the box.Jhipster will definitely help you to bootstrap Spring boot and angular js application faster.
That’s all about Jhipster.


