In this tutorial, we will see about JSON server.
Let’s say you are front-end developer and need to integrate backend calls with REST APIs but you came to know from backend team that REST APIs are not completed yet and will take some time to do the coding. How will you proceed now?
JSON server can help you in these kinds of situation by mocking REST APIs. JSON server provides fake REST APIs which can be used for mocking and testing without any coding.
JSON Server is a simple project that helps you to set up a REST API with CRUD operations real fast.
Please note that JSON server is available as an NPM package, so you need to have NPM installed on your machine.
Let’s get started with JSON server.
Step 1: Install JSON server.
-g option is used to make sure JSON server is installed on machine globally.
Step 2: Create JSON file named countries.json to mock data.
|
1 2 3 4 5 6 7 8 9 10 11 12 13 14 15 16 |
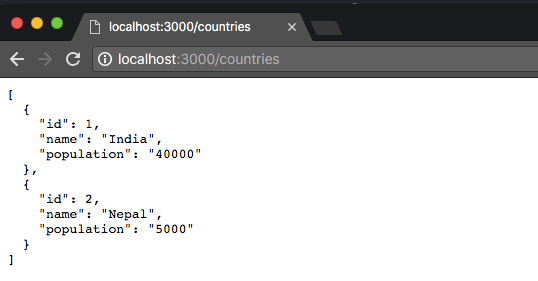
{ "countries": [ { "id": 1, "name": "India", "population": "40000" }, { "id": 2, "name": "Nepal", "population": "5000" } ] } |
Run following command in terminal.
Based on countries.json, here are some default routes for Rest APIs.
GET /countries/1
POST /countries
PUT /countries/1
PATCH /countries/1
DELETE /countries/1
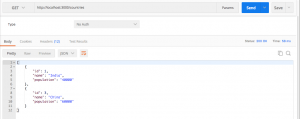
Step 3: Go to the browser and browse this URL “http://localhost:3000/countries”.
Please note the following points while doing the request.
- You can do PUT, POST and DELETE request and changes will be reflected in countries.json.
- Request body should be object enclosed.
- Id values are immutable and can not be changed. If you put Id in PUT or PATCH request, it will be ignored.
- If you put id in post and if it is already taken, then request will be ignored as well.
- A POST, PUT or PATCH request should include a
Content-Type: application/jsonheader to use the JSON in the request body.
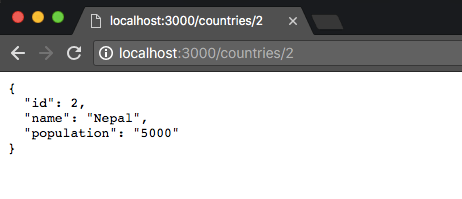
Get country based on id
URL: “http://localhost:3000/countries/2”.
We will use post to test POST, PUT and DELETE request.
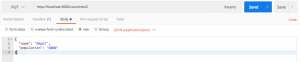
Let’s put “content type “= “application/json” in header as below. As it will be required for all POST, PUT and DELETE request.

Step 4:Let’s send post request with body
|
1 2 3 4 5 6 |
{ "name": "China", "population": "60000" } |
URL: “http://localhost:3000/countries/”

Let’s send get request again to check if our post request was successful.
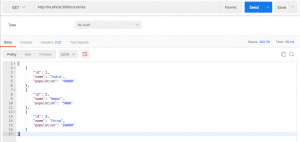
As you can see china is added to countries list now.
Step 5: Let’s send put request with body
|
1 2 3 4 5 6 |
{ "name": "Nepal", "population": "6000" } |
URL: “http://localhost:3000/countries/2”
Let’s send get request again to check if our put request was successful.

As you can see Nepal’s population is updated to 6000.
Step 6: Let’s send delete request
URL : “http://localhost:3000/countries/2”

Let’s send get request again to check if our delete request was successful.
As you can see Country with id=2 is removed from country list.
That’s all about creating REST API with JSON server.


