Table of Contents
In this tutorial, we will see how to create Restful web services using Spring boot.
There are not many differences between creating Rest API using Spring Rest JSON which we have already seen earlier. Spring Boot just makes easier to Rest API. You don’t have to provide any additional JSON dependency in the classpath. Spring Boot will take care of all the dependencies required to create Rest API.
Here are steps to create a simple Spring boot rest example.
Spring Boot Rest example:
Github Source code:
Project structure:
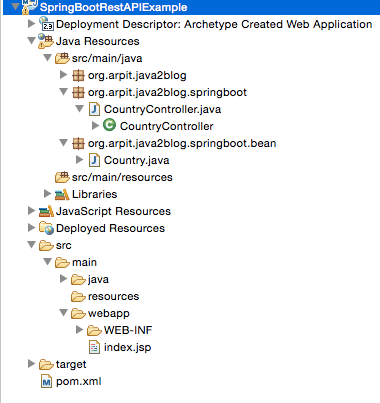
Step 1: Create a dynamic web project using maven in eclipse named "SpringBootRestAPIExample".
pom.xml
|
1 2 3 4 5 6 7 8 9 10 11 12 13 14 15 16 17 18 19 20 21 22 23 24 25 26 |
<project xmlns="http://maven.apache.org/POM/4.0.0" xmlns:xsi="http://www.w3.org/2001/XMLSchema-instance" xsi:schemaLocation="http://maven.apache.org/POM/4.0.0 http://maven.apache.org/maven-v4_0_0.xsd"> <modelVersion>4.0.0</modelVersion> <groupId>org.arpit.java2blog</groupId> <artifactId>SpringBootRestAPIExample</artifactId> <packaging>war</packaging> <version>0.0.1-SNAPSHOT</version> <name>SpringBootRestAPIExample Maven Webapp</name> <url>http://maven.apache.org</url> <parent> <groupId>org.springframework.boot</groupId> <artifactId>spring-boot-starter-parent</artifactId> <version>1.5.3.RELEASE</version> </parent> <dependencies> <dependency> <groupId>org.springframework.boot</groupId> <artifactId>spring-boot-starter-web</artifactId> </dependency> </dependencies> <build> <finalName>SpringBootRestAPIExample</finalName> </build> </project> |
Step 3: Create a bean name "Country.java" in org.arpit.java2blog.springboot.bean.
|
1 2 3 4 5 6 7 8 9 10 11 12 13 14 15 16 17 18 19 20 21 22 23 24 25 26 27 28 |
package org.arpit.java2blog.bean; public class Country{ int id; String countryName; public Country(int i, String countryName) { super(); this.id = i; this.countryName = countryName; } public int getId() { return id; } public void setId(int id) { this.id = id; } public String getCountryName() { return countryName; } public void setCountryName(String countryName) { this.countryName = countryName; } } |
Create controller
Step 4: Create a controller named "CountryController.java" in package org.arpit.java2blog.springboot
|
1 2 3 4 5 6 7 8 9 10 11 12 13 14 15 16 17 18 19 20 21 22 23 24 25 26 27 28 29 30 31 32 33 34 35 36 37 38 39 40 41 42 43 44 45 46 47 48 49 50 51 52 53 54 |
package org.arpit.java2blog.springboot; import java.util.ArrayList; import java.util.List; import org.arpit.java2blog.springboot.bean.Country; import org.springframework.web.bind.annotation.PathVariable; import org.springframework.web.bind.annotation.RequestMapping; import org.springframework.web.bind.annotation.RequestMethod; import org.springframework.web.bind.annotation.RestController; @RestController public class CountryController { @RequestMapping(value = "/countries", method = RequestMethod.GET,headers="Accept=application/json") public List<Country> getCountries() { List<Country> listOfCountries = new ArrayList<Country>(); listOfCountries=createCountryList(); return listOfCountries; } @RequestMapping(value = "/country/{id}", method = RequestMethod.GET,headers="Accept=application/json") public Country getCountryById(@PathVariable int id) { List<Country> listOfCountries = new ArrayList<Country>(); listOfCountries=createCountryList(); for (Country country: listOfCountries) { if(country.getId()==id) return country; } return null; } // Utiliy method to create country list. public List<Country> createCountryList() { Country indiaCountry=new Country(1, "India"); Country chinaCountry=new Country(4, "China"); Country nepalCountry=new Country(3, "Nepal"); Country bhutanCountry=new Country(2, "Bhutan"); List<Country> listOfCountries = new ArrayList<Country>(); listOfCountries.add(indiaCountry); listOfCountries.add(chinaCountry); listOfCountries.add(nepalCountry); listOfCountries.add(bhutanCountry); return listOfCountries; } } |
@PathVariable: Used to inject values from the URL into a method parameter.This way you inject id in getCountryById method.
Spring application configuration:
Step 5: Create a package named "org.arpit.java2blog"
create a class named "SpringBootHelloWorldApplication.java"
|
1 2 3 4 5 6 7 8 9 10 11 12 13 14 |
package org.arpit.java2blog; import org.springframework.boot.SpringApplication; import org.springframework.boot.autoconfigure.SpringBootApplication; @SpringBootApplication public class SpringBootHelloWorldApplication { public static void main(String[] args) { SpringApplication.run(SpringBootHelloWorldApplication.class, args); } } |
We have just added @SpringBootApplication and it does all the work.
Let’s understand more about this annotation.
@SpringBootApplication is an annotation that adds all of the following:
@Configuration makes the class as a source of bean definitions for the application context.
@EnableAutoConfiguration enables Spring boot to add beans presents in classpath setting and various property setting.
Normally you would add @EnableWebMvc for a Spring MVC application, but Spring Boot adds it automatically when it sees spring-webmvc on the classpath.
This flags the application as a web application and activates key behaviors such as setting up a DispatcherServlet.
@ComponentScan tells Spring to look for other components, configurations, and services in the default package, allowing it to find the controllers.
If specific packages are not defined, scanning will occur from the package of the class that declares this annotation.
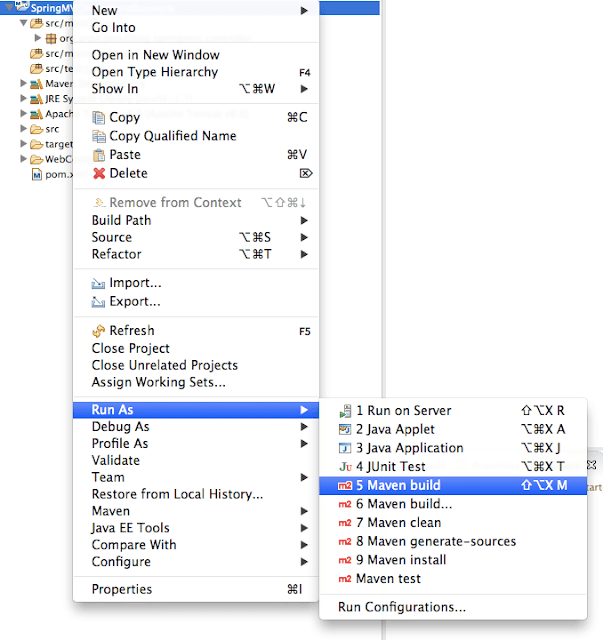
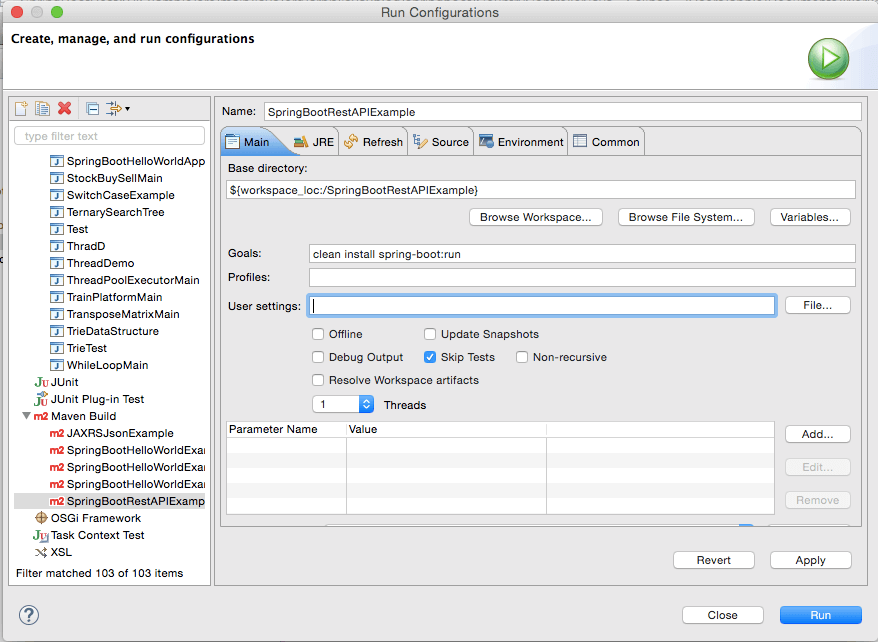
Step 6: It ‘s time to do maven build.
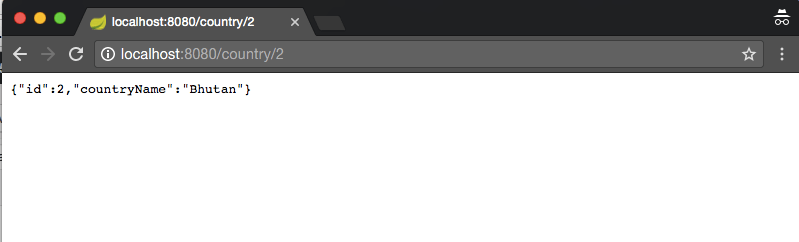
You will get following output:
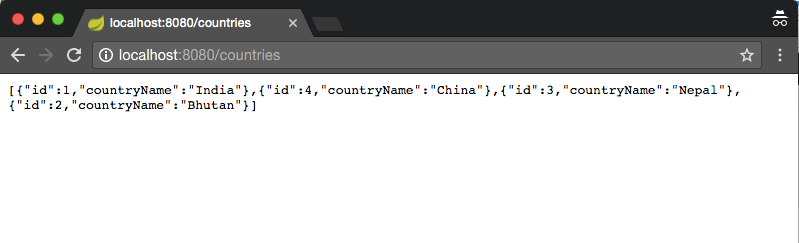
“http://localhost:8080/country/2”.