- Introduction to web services
- Web services interview questions
- SOAP web service introduction
- RESTful web service introduction
- Difference between SOAP and REST web services
- SOAP web service example in java using eclipse
- JAX-WS web service eclipse tutorial
- JAX-WS web service deployment on tomcat
- Create RESTful web service in java(JAX-RS) using jersey
- RESTful web service JAXRS
- json example using jersey
- RESTful web service
- JAXRS CRUD example using jersey
- AngularJS RESTful web service
- JAXRS CRUD example using $http
- RESTful Web Services (JAX-RS) @QueryParam Example
- Spring Rest simple example
- Spring Rest json example
- Spring Rest xml example
- Spring Rest CRUD example
We have already seen Restful web services tutorial and Spring mvc web example. In this post, we will see combination of both.
1) Create a dynamic web project using maven in eclipse.
2) Now change pom.xml as follows:
pom.xml
|
1 2 3 4 5 6 7 8 9 10 11 12 13 14 15 16 17 18 19 20 21 22 23 24 25 26 27 28 29 30 31 32 33 34 35 36 37 38 39 40 41 42 43 44 45 46 47 48 49 50 51 52 53 54 55 56 57 |
<project xmlns="http://maven.apache.org/POM/4.0.0" xmlns:xsi="http://www.w3.org/2001/XMLSchema-instance" xsi:schemaLocation="http://maven.apache.org/POM/4.0.0 http://maven.apache.org/maven-v4_0_0.xsd"> <modelVersion>4.0.0</modelVersion> <groupId>com.arpit.java2blog</groupId> <artifactId>SpringRestfulWebServicesExample</artifactId> <packaging>war</packaging> <version>0.0.1-SNAPSHOT</version> <name>SpringRestfulWebServicesExample Maven Webapp</name> <url>http://maven.apache.org</url> <dependencies> <dependency> <groupId>junit</groupId> <artifactId>junit</artifactId> <version>3.8.1</version> <scope>test</scope> </dependency> <dependency> <groupId>javax.servlet</groupId> <artifactId>javax.servlet-api</artifactId> <version>3.1.0</version> </dependency> <dependency> <groupId>org.springframework</groupId> <artifactId>spring-core</artifactId> <version>${spring.version}</version> </dependency> <dependency> <groupId>org.springframework</groupId> <artifactId>spring-webmvc</artifactId> <version>${spring.version}</version> </dependency> </dependencies> <build> <finalName>SpringRestfulHelloWorldExample</finalName> <plugins> <plugin> <groupId>org.apache.maven.plugins</groupId> <artifactId>maven-compiler-plugin</artifactId> <version>3.1</version> <configuration> <source>${jdk.version}</source> <target>${jdk.version}</target> </configuration> </plugin> </plugins> </build> <properties> <spring.version>4.2.1.RELEASE</spring.version> <jdk.version>1.7</jdk.version> </properties> </project> |
Spring application configuration:
3) Change web.xml as below:
|
1 2 3 4 5 6 7 8 9 10 11 12 13 14 15 16 17 18 19 20 21 |
<!DOCTYPE web-app PUBLIC "-//Sun Microsystems, Inc.//DTD Web Application 2.3//EN" "http://java.sun.com/dtd/web-app_2_3.dtd" > <web-app> <display-name>Archetype Created Web Application</display-name> <servlet> <servlet-name>springrest</servlet-name> <servlet-class> org.springframework.web.servlet.DispatcherServlet </servlet-class> <load-on-startup>1</load-on-startup> </servlet> <servlet-mapping> <servlet-name>springrest</servlet-name> <url-pattern>/</url-pattern> </servlet-mapping> </web-app> |
4) create a xml file named springrest-servlet.xml in /WEB-INF/ folder.
Please change context:component-scan if you want to use different package for spring to search for controller.Please refer to spring mvc hello world example for more understanding.
|
1 2 3 4 5 6 7 8 9 10 11 12 |
<beans xmlns="http://www.springframework.org/schema/beans" xmlns:context="http://www.springframework.org/schema/context" xmlns:mvc="http://www.springframework.org/schema/mvc" xmlns:xsi="http://www.w3.org/2001/XMLSchema-instance" xsi:schemaLocation=" http://www.springframework.org/schema/beans http://www.springframework.org/schema/beans/spring-beans-3.0.xsd http://www.springframework.org/schema/context http://www.springframework.org/schema/context/spring-context-3.0.xsd http://www.springframework.org/schema/mvc http://www.springframework.org/schema/mvc/spring-mvc-3.0.xsd"> <mvc:annotation-driven/> <context:component-scan base-package="org.arpit.java2blog.controller" /> </beans> |
Create controller
5) Create a controller named “SpringRestController.java”
|
1 2 3 4 5 6 7 8 9 10 11 12 13 14 15 16 17 |
package org.arpit.java2blog.controller; import org.springframework.web.bind.annotation.PathVariable; import org.springframework.web.bind.annotation.RequestMapping; import org.springframework.web.bind.annotation.RequestMethod; import org.springframework.web.bind.annotation.RestController; @RestController @RequestMapping("/hello") public class SpringRestController { @RequestMapping(value = "/{name}", method = RequestMethod.GET) public String hello(@PathVariable String name) { String result="Hello "+name; return result; } } |
@PathVariable: Used to inject values from the URL into a method parameter.This way you inject name in hello method .
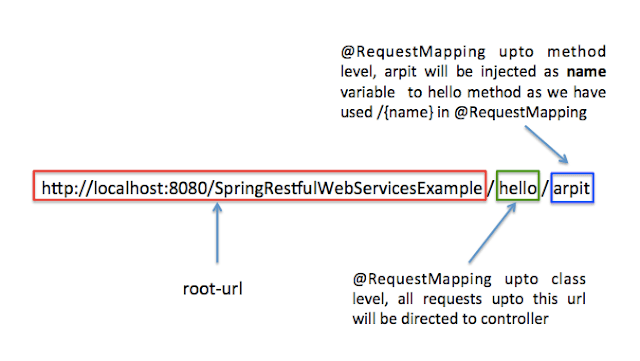
We are not providing any view information in springrest-servlet.xml as we do in Spring MVC. If we need to directly get resource from controller, we need to return @ResponseBody as per Spring 3 but with Spring 4, we can use @RestController for that.
In spring 4.0, we can use @RestController which is combination of @Controller + @ResponseBody.
|
1 2 3 |
@RestController = @Controller + @ResponseBody |
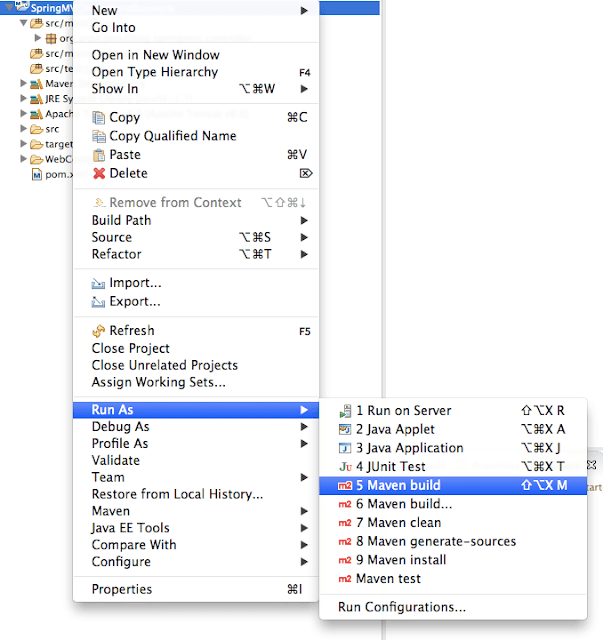
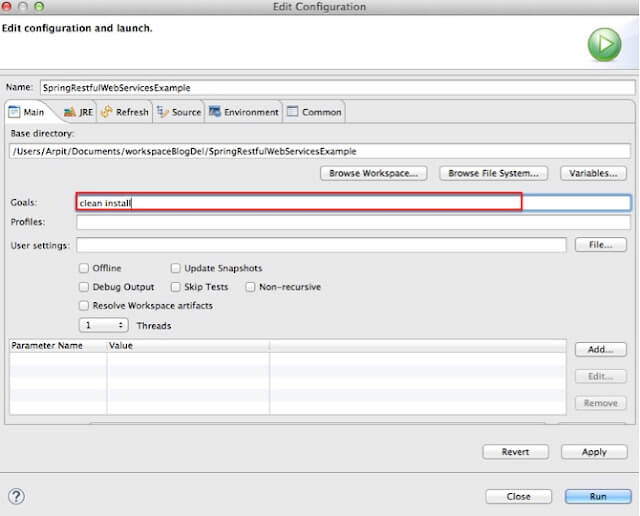
6) It ‘s time to do maven build.
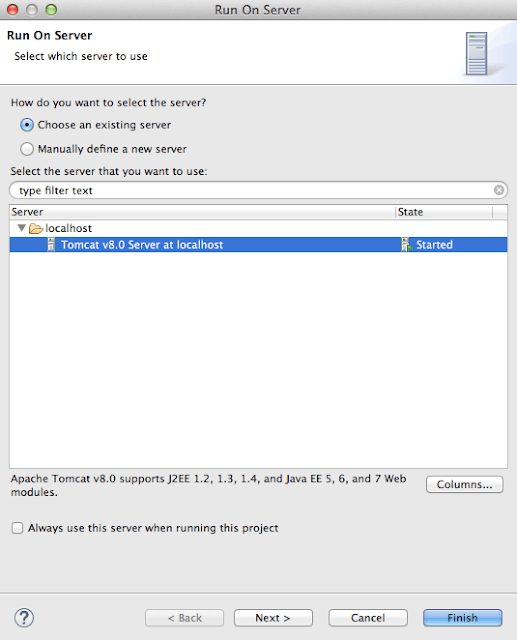
Run the application
You will get following output:
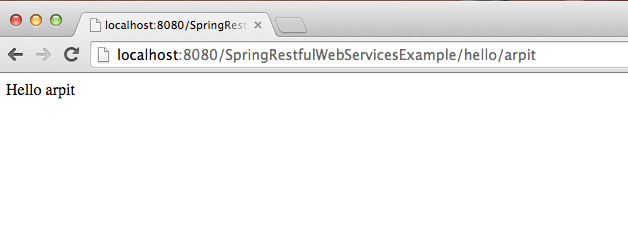
That’s all about Spring Restful web services example.


Hi, your post is good, but why only Hello World example as its so simple.
Post some credential like from front-end application to connect to database and records gets reflected.
Regards,
Devesh A
WARNING: No mapping found for HTTP request with URI [/SpringRestfulWebServicesExample/hello/arpit] in DispatcherServlet with name 'springrest'
I am getting this above warning with Http status 404 Error
try to change your src/main/resources folder to src/main/java .it worked for me