Table of Contents
In this post, we will develop Restful web services example in java using jersey in eclipse
Web service Tutorial Content:
- Introduction to web services
- Web services interview questions
- SOAP web service introduction
- RESTful web service introduction
- Difference between SOAP and REST web services
- SOAP web service example in java using eclipse
- JAX-WS web service eclipse tutorial
- JAX-WS web service deployment on tomcat
- Create RESTful web service in java(JAX-RS) using jersey
- RESTful web service
- JAJSONexample using jersey
- RESTful web service
- JAXRS CRUD example using jersey
- AngularJS RESTful web service
- JAXRS CRUD example using $http
- RESTful Web Services (JAX-RS) @QueryParam Example
- Spring Rest simple example
- Spring Rest json example
- Spring Rest xml example
- Spring Rest CRUD example
Jersey is the reference implementation for this specification. Jersey contains basically a REST server and a REST client. The core client can communicate with the server using jersey lib.
On the server side Jersey uses a servlet which scans predefined classes to identify RESTful resources. Via the web.xml configuration file for your web application.
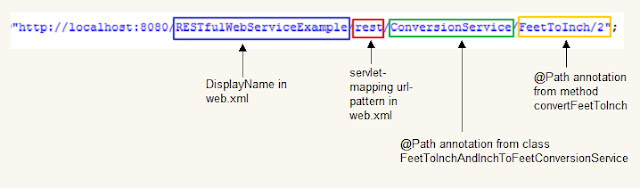
The base URL of this servlet is:
|
1 2 3 |
<b>http://your_domain:port/display-name/url-pattern/path_from_rest_class </b> |
This servlet analyzes the incoming HTTP request and selects the correct class and method on request. This selection is based on annotations provided in the class and methods.
Let’s see Restful web services example in java now.
Prerequisites:
- Java SE 6
- Download the zip of Jersey files from this location – https://jersey.java.net/download.html
- Eclipse IDE
1) Open eclipse.
2) Create new dynamic web project named “RESTfulWebServiceExample”
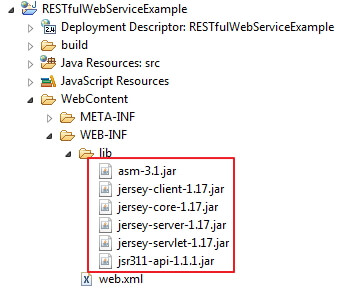
3) Now go to location where you have download jersey and go to jersey-archive-1.17->lib
folder.you can have all jars but for now you can copy following jars
- asm-3.1
- jersey-client-1.17
- jersey-core-1.17
- jersey-server-1.17
- jersey-servlet-1.17
- jsr311-api-1.1.1
Paste all above copied jars to WebContent->WEB-INF->lib
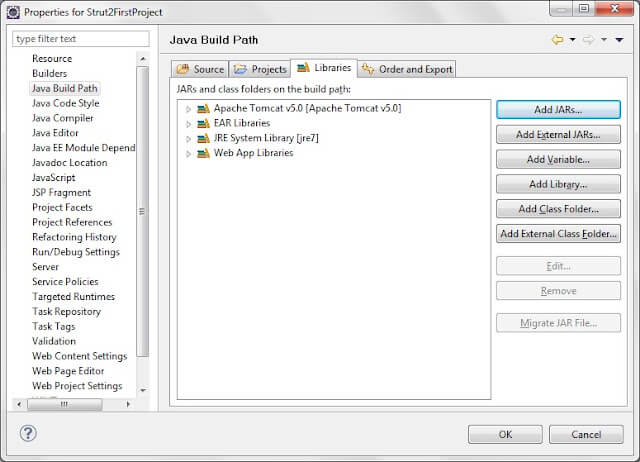
Click on Java Build Path and then Add jars as shown in above diagram.
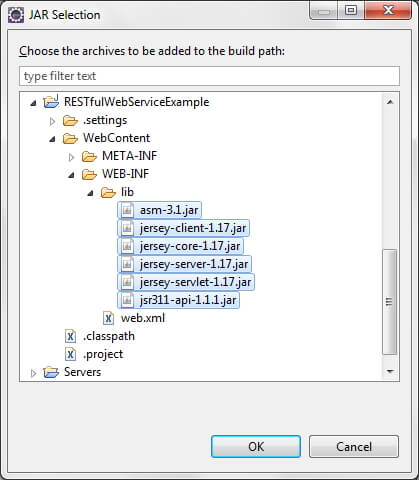
go to project->WebContent->WEB-INF->lib and select all jars then click on ok.
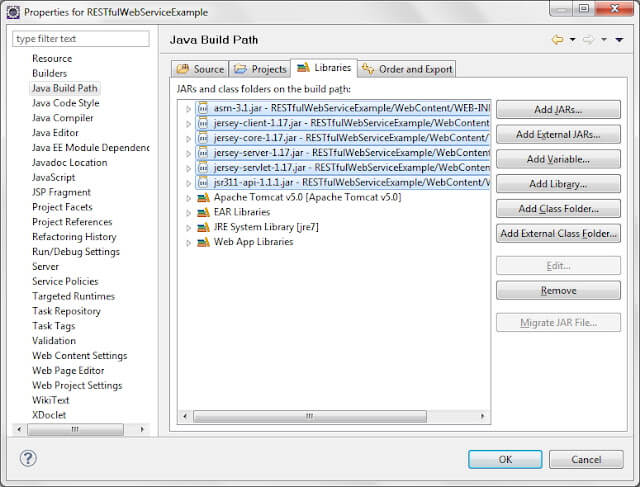
Click ok.Jersey jars added to class path.
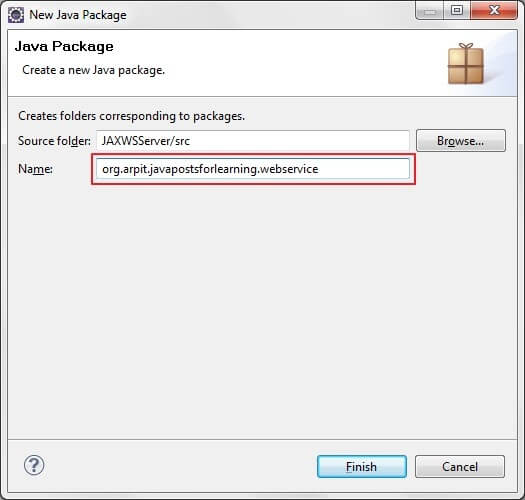
4) Create new package named “org.arpit.javapostsforlearning.webservice”
5)Create FeetToInchAndInchToFeetConversionService.java
|
1 2 3 4 5 6 7 8 9 10 11 12 13 14 15 16 17 18 19 20 21 22 23 24 25 26 27 28 29 30 31 32 33 34 35 36 37 38 39 40 41 42 43 44 45 46 47 |
package org.arpit.javapostsforlearning.webservices; /** * @author Arpit Mandliya */ import javax.ws.rs.GET; import javax.ws.rs.Path; import javax.ws.rs.PathParam; import javax.ws.rs.Produces; import javax.ws.rs.core.MediaType; @Path("ConversionService") public class FeetToInchAndInchToFeetConversionService { @GET @Path("/InchToFeet/{i}") @Produces(MediaType.TEXT_XML) public String convertInchToFeet(@PathParam("i") int i) { int inch=i; double feet = 0; feet =(double) inch/12; return "<InchToFeetService>" + "<Inch>" + inch + "</Inch>" + "<Feet>" + feet + "</Feet>" + "</InchToFeetService>"; } @Path("/FeetToInch/{f}") @GET @Produces(MediaType.TEXT_XML) public String convertFeetToInch(@PathParam("f") int f) { int inch=0; int feet = f; inch = 12*feet; return "<FeetToInchService>" + "<Feet>" + feet + "</Feet>" + "<Inch>" + inch + "</Inch>" + "</FeetToInchService>"; } } |
@Path(/your_path_at_class_level) : Sets the path to base URL + /your_path_at_class_level. The base URL is based on your application name, the servlet and the URL pattern from the web.xml” configuration file.
@Path(/your_path_at_method_level): Sets path to base URL + /your_path_at_class_level+ /your_path_at_method_level
@Produces(MediaType.TEXT_XML [, more-types ]): @Produces defines which MIME type is delivered by a method annotated with @GET. In the example text (“text/XML”) is produced.
@PathParam: Used to inject values from the URL into a method parameter.This way you inject inch in convertFeetToInch method and convert that to feet.
|
1 2 3 4 5 6 7 8 9 10 11 12 13 14 15 16 17 18 19 20 |
<!--?xml version="1.0" encoding="UTF-8"?--> <?xml version="1.0" encoding="UTF-8"?> <web-app xmlns:xsi="http://www.w3.org/2001/XMLSchema-instance" xmlns="http://java.sun.com/xml/ns/javaee" xmlns:web="http://java.sun.com/xml/ns/javaee/web-app_2_5.xsd" xsi:schemaLocation="http://java.sun.com/xml/ns/javaee http://java.sun.com/xml/ns/javaee/web-app_2_5.xsd" id="WebApp_ID" version="2.5"> <display-name>RESTfulWebServiceExample</display-name> <servlet> <servlet-name>Jersey REST Service</servlet-name> <servlet-class>com.sun.jersey.spi.container.servlet.ServletContainer</servlet-class> <init-param> <param-name>com.sun.jersey.config.property.packages</param-name> <param-value>org.arpit.javapostsforlearning.webservices</param-value> </init-param> <load-on-startup>1</load-on-startup> </servlet> <servlet-mapping> <servlet-name>Jersey REST Service</servlet-name> <url-pattern>/rest/*</url-pattern> </servlet-mapping> </web-app> |
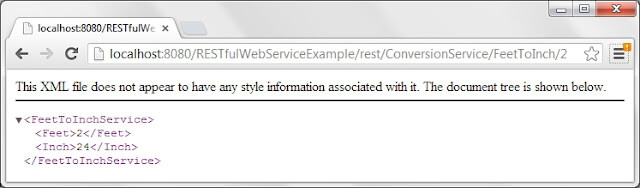
If You see web service information page then you are done.
Creating a Restful Web Service Client:
|
1 2 3 4 5 6 7 8 9 10 11 12 13 14 15 16 17 18 19 20 21 22 23 24 25 26 27 28 29 30 31 32 33 34 35 36 37 38 39 40 41 42 43 44 45 |
package org.arpit.javapostsforlearning.webservices.client; import javax.ws.rs.core.MediaType; import com.sun.jersey.api.client.Client; import com.sun.jersey.api.client.ClientResponse; import com.sun.jersey.api.client.WebResource; import com.sun.jersey.api.client.config.ClientConfig; import com.sun.jersey.api.client.config.DefaultClientConfig; public class ConversionServiceClient { static final String REST_URI = "http://localhost:8080/RESTfulWebServiceExample"; static final String INCH_TO_FEET = "/ConversionService/InchToFeet/"; static final String FEET_TO_INCH = "/ConversionService/FeetToInch/"; public static void main(String[] args) { int inch=12; int feet=2; ClientConfig config = new DefaultClientConfig(); Client client = Client.create(config); WebResource service = client.resource(REST_URI); WebResource addService = service.path("rest").path(INCH_TO_FEET+inch); System.out.println("INCH_TO_FEET Response: " + getResponse(addService)); System.out.println("INCH_TO_FEET Output as XML: " + getOutputAsXML(addService)); System.out.println("---------------------------------------------------"); WebResource subService = service.path("rest").path(FEET_TO_INCH+feet); System.out.println("FEET_TO_INCH Response: " + getResponse(subService)); System.out.println("FEET_TO_INCH Output as XML: " + getOutputAsXML(subService)); System.out.println("---------------------------------------------------"); } private static String getResponse(WebResource service) { return service.accept(MediaType.TEXT_XML).get(ClientResponse.class).toString(); } private static String getOutputAsXML(WebResource service) { return service.accept(MediaType.TEXT_XML).get(String.class); } } |
Output:
|
1 2 3 4 5 6 7 8 |
INCH_TO_FEET Response: GET http://localhost:8080/RESTfulWebServiceExample/rest/ConversionService/InchToFeet/12 returned a response status of 200 OK INCH_TO_FEET Output as XML: 121.0 --------------------------------------------------- FEET_TO_INCH Response: GET http://localhost:8080/RESTfulWebServiceExample/rest/ConversionService/FeetToInch/2 returned a response status of 200 OK FEET_TO_INCH Output as XML: 224 --------------------------------------------------- |
Source code :
1.2 MB .zip
You can also check important Restful interview questions with answers
That’s all about Restful web services example in java.
Thank you for the quality of this tuto, when I did the tp for the first time, I was blocked, the xml (WADL) tag did not display at the browser, after hours of testing, I downloaded the source code and I realized that it is necessary to add xml tags at the level of the return service, which is not the fact in the tutorial
also my experience, as per donm – thanks for these great tutos, Arpit!!
Very nice, the first article which worked , honestly
Thank you. As Pramod also said, this is the first tutorial that actually worked for me. Really appreciate you taking the time to share this.