In this post, we will see how to change java version in intellij.
Steps to change java version in intellij IDEA
Here are steps to change java version in Intellij
idea.
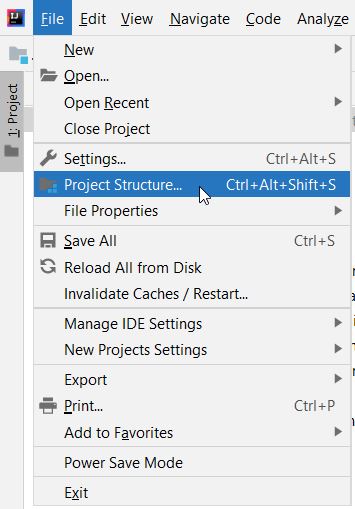
- Go to
File->Project Structure
If you prefer keyboard shortcuts:
Windows: Ctrl + Shift + Alt + SMac: CMD + ;
Following pop up will be displayed in intellij.
- Navigate to
Project Setting->SDKand add JDK.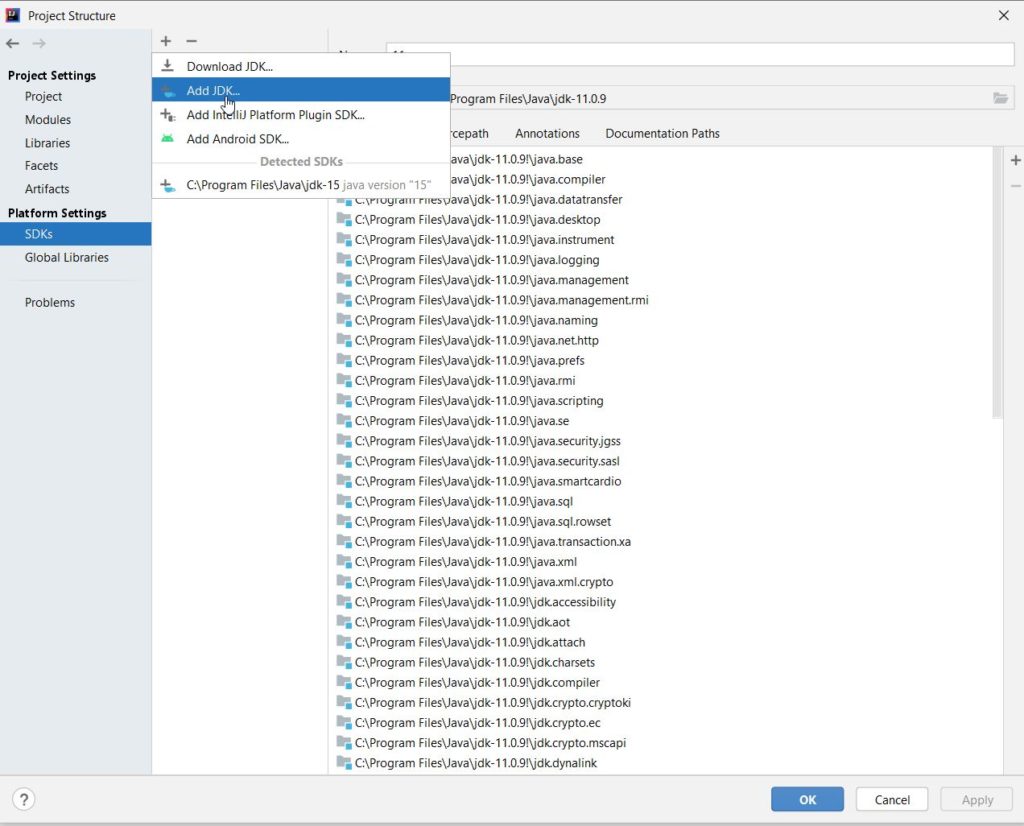
If you have already configured JDK, then select the JDK.
- Go to
Project Settings->Projectand changeProject SDKandProject language levelto previously added java version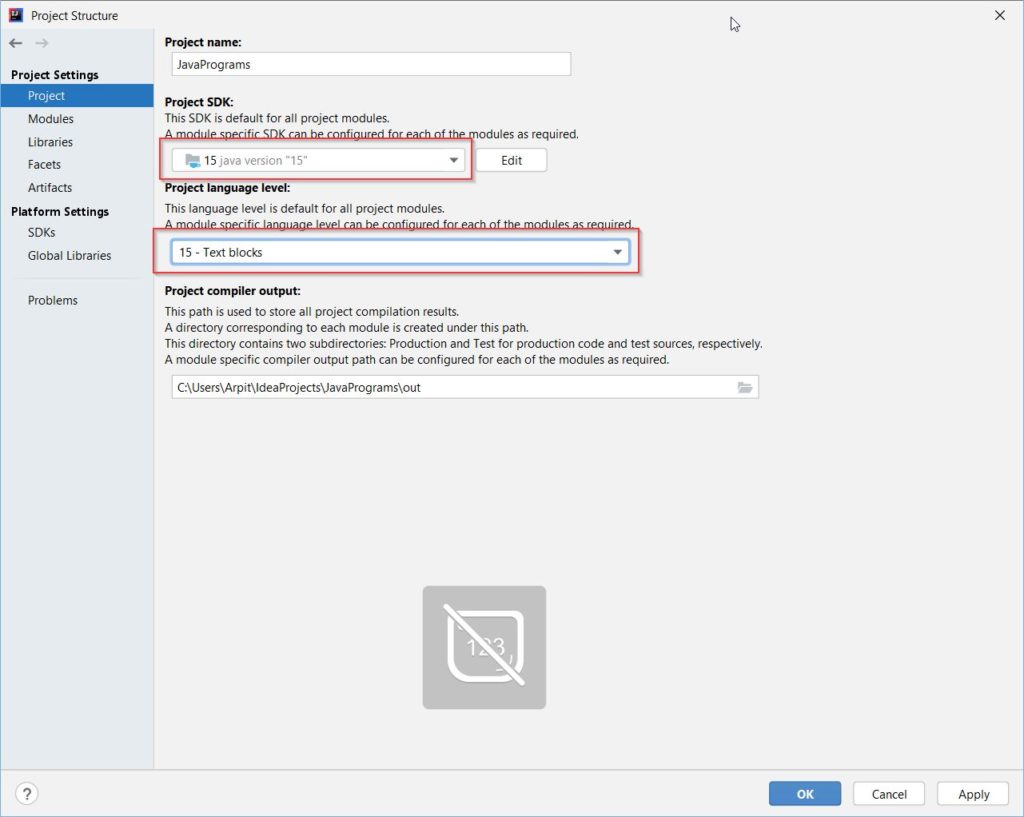
Once you change the JDK version, project will start reindexing its source files and libraries to ensure all JDK features are in sync.
- Naviage to
Project Settings->Projectand change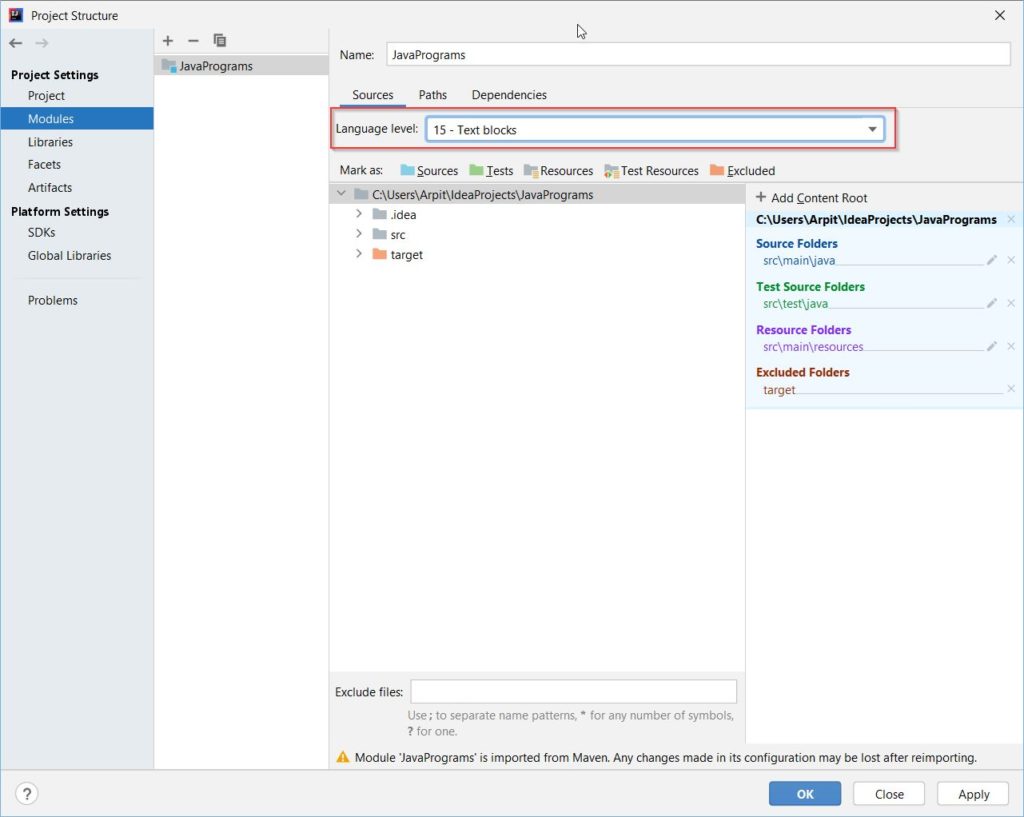
💡 Did you know?
Please note that when you change java version in intellij, it will only be used by intellij. If you run the java program via command line, then it will use
JAVA_HOMEjava version.It won’t also change JVM used by build tools such as maven or gradle.
That’s all about how to change java version in intellij.
Was this post helpful?
Let us know if this post was helpful. Feedbacks are monitored on daily basis. Please do provide feedback as that\'s the only way to improve.