Freestyle means improvised or unrestricted. A freestyle project in Jenkins is a project that spans multiple operations. It can be a build, a script run, or even a pipeline.
According to the official Jenkins wiki, a freestyle project is a typical build job or task. This could be as simple as running tests, building or packaging an application, sending a report, or even running some commands. Before any tests are run, data is collated. This can also be done by Jenkins. Jenkins collects data through multiple ways depending on what is being achieved and the purpose of the data in question.
A real-world scenario could involve, for instance, the collection of application artifacts after builds. In relation to management, Jenkins allows us to send reports at any defined stage, which could entail artifact information, or shipping application logs to a log management entity, such as Elasticsearch.
Table of Contents
Setting up Freestyle Projects
Let’s try and set up freestyle projects using Jenkins. You need to first ensure that you have Jenkins up and running, and that you are authenticated as the admin. To set up a freestyle project, follow these steps:
1. Open the main dashboard to create a project using the New Item option on the left navigation menu.
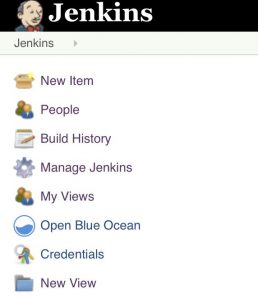
Here’s what the menu looks like:
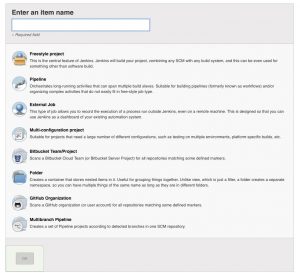
The view above presents the various job types Jenkins supports. This article will solely focus on Freestyle projects, but you will, however, look into more jobs and items as we progress.
2. Enter the name as jenkins-python-run and select Freestyle project as highlighted in the following screenshot, and then select OK.

Jenkins should automatically take you to the project configuration view. All content can be quickly accessed through the tabs. Take a look at this screenshot:
![]()
You’ll take a look at all the content step by step. For now, let’s understand what the Source Code Management resource does. This checks out code from version control hosts. This means that if your code is hosted on GitHub or any other web-based repositories, you can add the repository details and Jenkins will clone it.

Feel free to use the quick tips displayed in the blue question mark icons, as they can be very resourceful and provide more clarification.
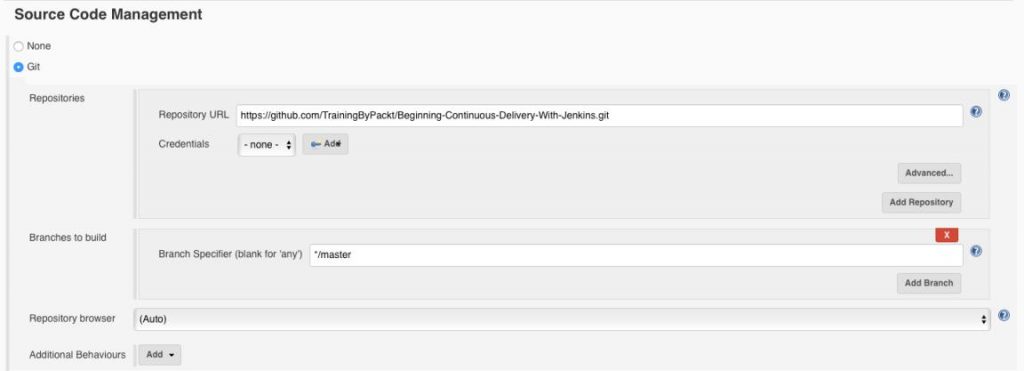
3. Select Git and the following menu should drop down. This entails the information needed to clone a Git repository.
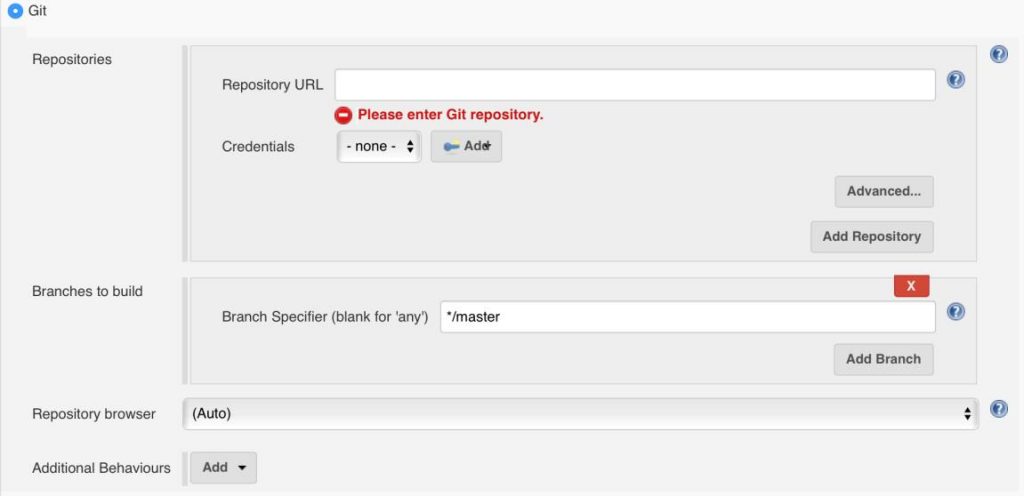
4. Let’s get the repository we are going to build from GitHub. From your browser, head to the followingaddress https://github.com/TrainingByPackt/Beginning-Jenkins.
From the repository, note that we are on the master branch. Take a look at this screenshot:

5. Select the Clone or download button and copy the link, as shown in the following screenshot:
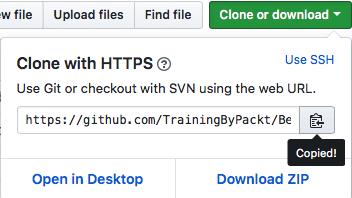
This is the link Jenkins will use to clone the repository in order to run our tests.
6. Back on our project configuration, add the repository link as follows:

Now, let’s get back to examining what the rest of the tabs in the project configuration view do. The Build Triggers resource helps in automating builds. When setting up pipelines, some of the processes need to be automated in order to be effective. Some of these processes may include build and deploy steps:
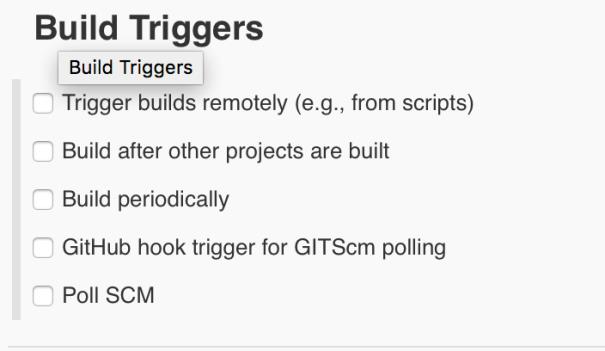
When changes are pushed to GitHub, Jenkins should automatically run tests and build applications instead of developers triggering manual builds each time. More of this will be covered in the next section.
The Build Environment resource, as its name suggests, is involved with the environment–more precisely, the application environment. Credentials need to be set to access a server, a language-specific detail (such as Python virtual environments), and project management resources such as ticket tags:
Under the Build menu, you will find the drop-down with the following options:
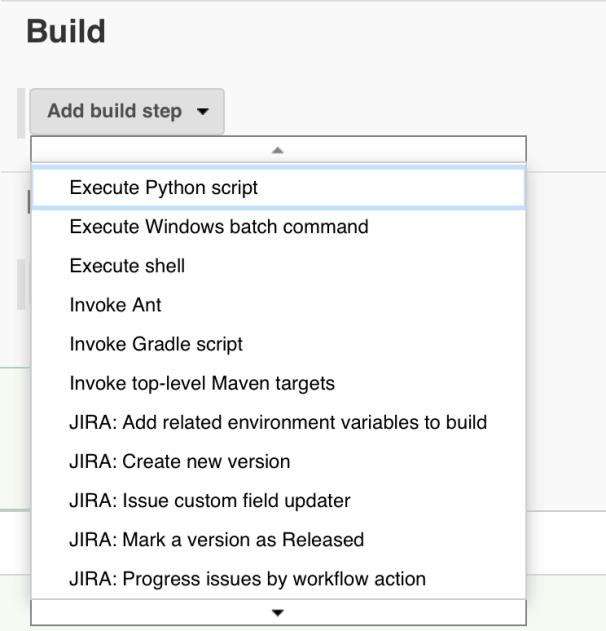
This resource defines the actual steps we want to achieve, for example:
- Do you want to run a script?
- Do you want to run a command?
The Post-Build Actions are actions you want to do after a task is done. For instance, if you were running tests on the Build option, you could:
- Send an email notification
- Generate and send a report
Setting up the build
Now that we’ve set up a freestyle project, let’s set up our build environment. Follow these steps:
1. On the project configuration page, select Apply and then Save. This should take you to the following page:

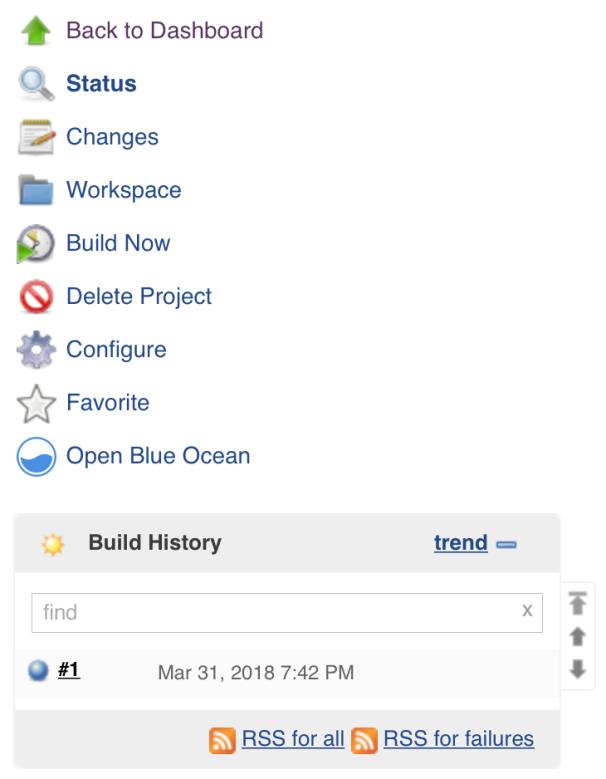
2. Select Build Now on the left navigation menu to run the build.
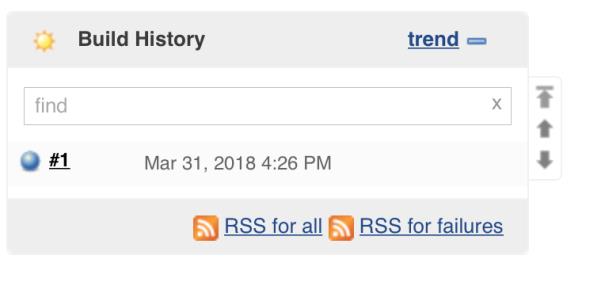
Notice that a number pops up on the Build History. Hover over the build number and select the drop-down list. This presents a quick menu for your builds. Open the Console Output to view the logs of our build, as shown here:
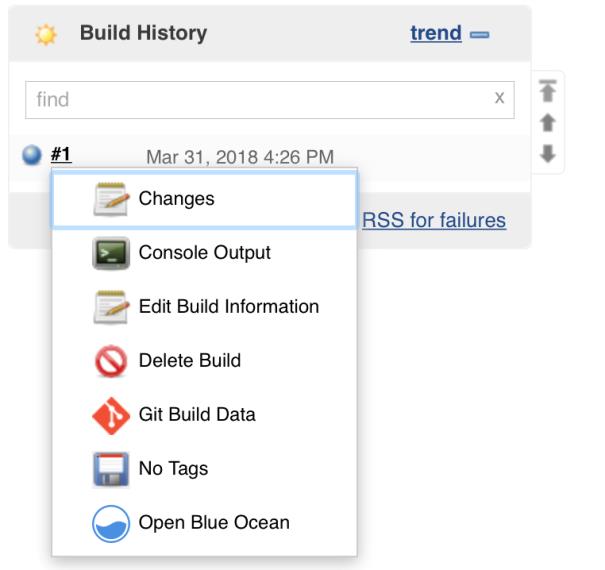
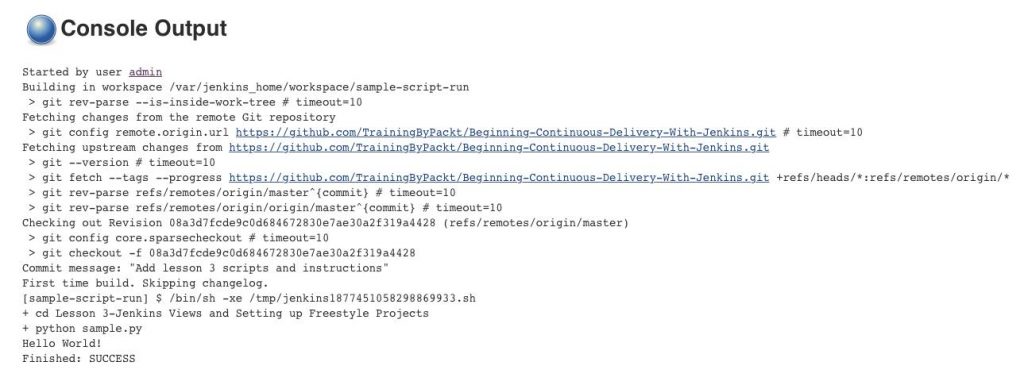
3. Hover over the number to get a drop-down, and select Console Output to view the build logs. The logs will tell you what happened when your code was being pulled, and if the build has an issue, this is the quickest way to identify it. Your window should have an output similar to the following:
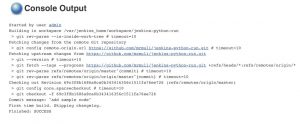
From the logs, you can identify the following:
- Who triggered the build
- The commands that were run to achieve the build’s purpose
- Any changes made
- Whether the build was a Success or a Fail
We haven’t run any code or tests, so let’s go ahead and complete our build by adding this.
4. Select Back to Project and then Configure, on the left navigation menu, which should take us back to the project configuration page.
5. Under Build, select Add build step. This will enable us to add a step for Jenkins to run our tests.
To achieve the same result, we will need to tell Jenkins to run the script, as we saw on the preceding terminal. This can be achieved by selecting Execute shell from the Add build step drop-down.
With this in mind, we can execute any kind of script, provided the necessary languages or tools are available on the Docker container. We are executing a shell, even though we are on a Windows operating system, because Jenkins is running in a Docker container:

6. Select Execute shell and the following window should pop up.

7. Add the commands on the prompt, as follows:

8. Select Apply, then Save. This will take you back to the project window.
9. On the left navigation menu, select Build Now to build the project.
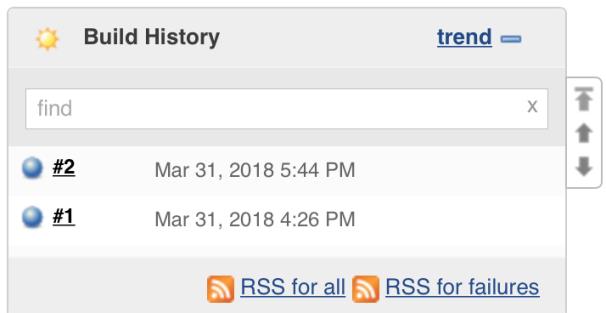
Jenkins will automatically schedule the build and display a new build number on the Build History pane, as shown:
Now, go ahead and open the Console Output and view the logs. Since Python is already set up on this container, the output shown here won’t display the logs; however, the test results will be displayed as follows:
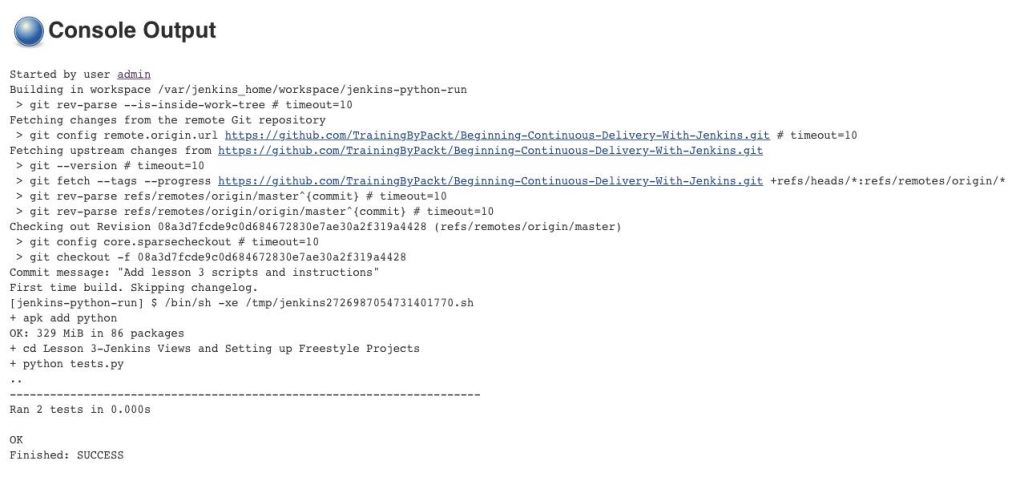
Congratulations! We now have a complete build. Let’s quickly recap what our build entails:
1. Jenkins will first pull the code from GitHub after we add the repository details.
2. Through the build step, Jenkins will run the Python script.
3. The logs on the console output tell us whether our build has failed or passed.
As you progress, you’ll get to understand how to set up more complex builds that can be triggered automatically and even send notifications.
Back on the main dashboard, notice how Jenkins has updated to factor in our build. You can now easily view and access our build(s), and on the left navigation menu, you can also view any build that is queued.

Activity: Setting up a Freestyle Project
Scenario
You have been asked to set up a freestyle project so that you can run a script via Jenkins from the repository link given below:
1. The script name is sample.py and the response should be Hello World.
2. Access the repository from https://github.com/TrainingByPackt/Beginning-Jenkins/tree/master/Lesson3.
Aim
To set up the freestyle project dashboard to access developer views and job
Prerequisites
Ensure that everyone has Jenkins up and running, and is authenticated as the admin.
Steps for Completion
1. Log in as the Administrator.
2. On the Dashboard, select the New Item option on the configuration panel.

3. Name the project as shown in the screenshot.

4. Under Source Code Management, select Git, and add the repository URL as shown:
5. Under Build, add the command to run the script.

6. Click Apply and Save.
7. On the left navigation menu, select the Build Now option, and the script should run.
8. Open the build console and observe the logs. The message Hello World! should be outputted on the console.
If you found this article interesting and want to learn more about Jenkins, you can explore Joseph Muli’s Jenkins Fundamentals. Thoroughly explaining the technology in an easy-to-understand language while perfectly balancing theory with hands-on exercises, Jenkins Fundamentals enables you to accelerate deliverables, manage builds, and automate pipelines with Jenkins.


